3. Catching Flies

In this activity you will create a computational model in which Frogs move around and eat Flies that are whizzing by. Feel free to try your own ideas and make the model your own!
Learning Objectives
- Start from scratch and program new features into a model
- Explain the difference between placing blocks within the "do" portion of a "create___do" block and outside of it
- Explain what agent traits are and how to change them
- Describe how agents interact with each other through collisions
- Create a new breed
- Edit Widgets
New Terms
Breeds • Remix • Socket
Model Overview
- Agent Types ("Breeds")
- Frogs
- Flies
- Behaviors
- Flies fly around randomly
- Frogs move around randomly
- Interactions
- When Frogs collide with Flies, they "eat" (delete) the fly
- Otherwise, everything bounces off everything else
- Data
- A line graph tracks the number of Frogs and Flies over time
Part 1: Create New Project and Add New Breeds
In this section, you will start your new project and make the pages for the two "breeds" (types of agents) that exist in the project: Flies and Frogs.
1. Make a New Project
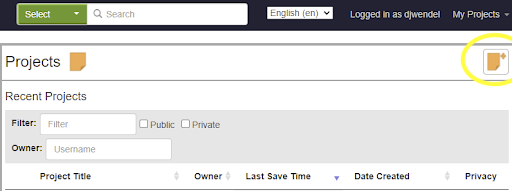
- Go to My Projects page and click the button to create a new project (circled in yellow).
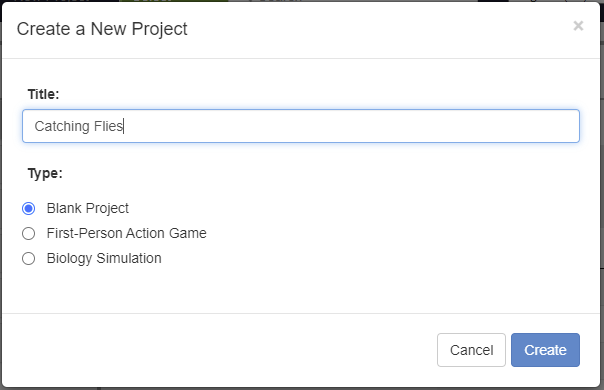
- Title your project "Catching Flies" and select Blank Project. Click "Create" to create the project.
2. Rename an Existing Breed
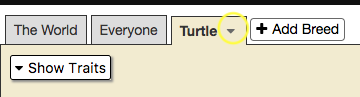
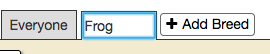
- Click the "Turtle" tab at the top of the code area, and then click the triangle to the left.
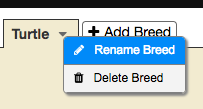
- Click the "Rename breed" button.
- Type "Frog" in the textbox and then click away to complete the rename.
3. Add a Second Breed
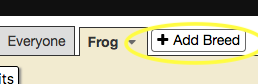

- Click the "Add Breed" button to add a new breed (type of agent).
- Name your new breed "Flies".
A breed is a type or category of agents. All agents of a specific breed share the same traits and follow the same instructions.
Check Your Progress!
Make sure you have the five tabs shown below in your Workspace:

If you are working with a partner, you can add them as a collaborator on this project. First click "Add this project to my gallery", select your Public Gallery, and click "submit". That will make the "Add collaborators to this project" button appear. Click this button, type your partner's username, and click "submit".
Part 2: Setup - Creating Flies
In this section you will create Flies and give them initial traits when the "setup" button is clicked.
1. Respond to Button Clicks
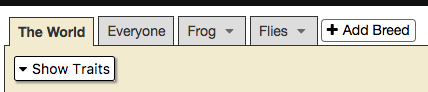
- Click "The World" tab to display "The World" page.
- Open the Interface drawer.
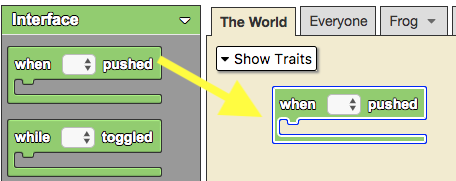
- Drag a "when ____ pushed" block from the drawer onto the page.
- Select "setup" from the drop-down menu. The "setup" option refers to the "setup" button which is located in SpaceLand.
Blocks represent instructions that agents follow. A program is a sequence of commands for agents to follow. To compose a program, blocks are connected to one another. For instance, connecting blocks inside of the "when ____ pushed" block tells the agent what to do when the chosen push button is clicked.
2. Create 10 Flies
- Open the Agents drawer.
- To create 10 flies in SpaceLand:
- Drag the "create___ each do" block below the "when [setup] pushed" block and connect it.
- Type the number "10" into the empty socket on the "create ___ each do" block.
- Select "Flies" from the drop-down menu in the block.
Each of the newly created agents immediately follows the directions you specify in the "do" section of the "create___ do" block.
3. Set the Color of the Flies
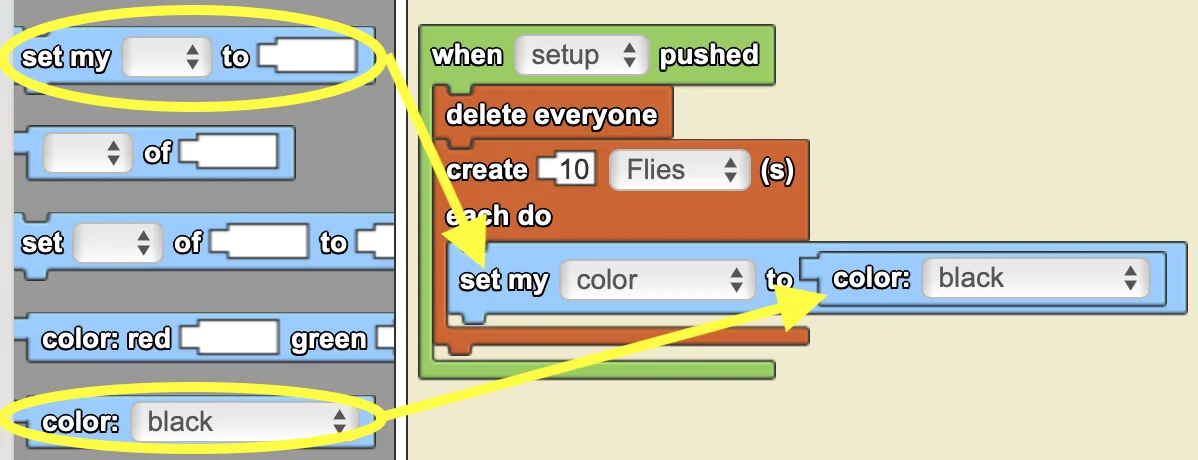
- Open the Traits drawer
- To set the color of the Flies:
- Drag the "set my ___ to ___" block and connect it inside the "create___ each do" block
- Drag the "color:___" block and place it into the empty socket on the "set my___ to ___" block.
- Choose the color "black" from the drop-down menu of the "color ___" block.
The "set my ___ to ___" block is used to set or change the traits of the agents. The "color:___" block represents a specific color chosen from the drop down menu. When specifying colors you should use one of the "color" blocks. Agents may not understand typed-in words like red, purple, yellow, etc.
4. Scatter the Flies
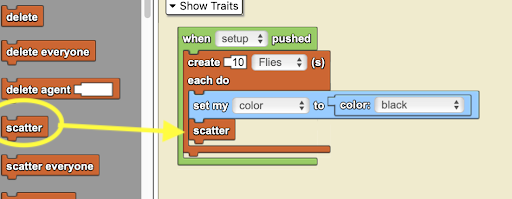
- Open the Agents drawer.
- To randomize the position of the flies in SpaceLand:
- Drag the "scatter" block and place it below the "set my___ to___" block, still inside the "create___ each do" block.
The "Scatter" block allows each of the 10 Flies to set its location to a random position in SpaceLand.
Check Your Progress!
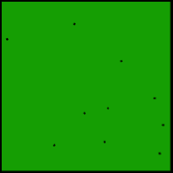
Click "Run Code" then every time you click "setup" you should see 10 more Flies.
Part 3: Setup - Creating a Frog
In this section, you will create a Frog and edit its traits.
Practice What You've Learned!
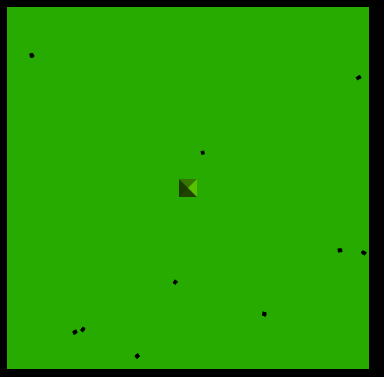
Use the skills and knowledge you learned in Part 2 to create a new Frog agent in SpaceLand: In the same "When [setup] pushed" block where you created the Flies, create 1 Frog agent whose color is green, size is 5, and shape is a pyramid (hint: use the "built-in shape" block).
Show Solution
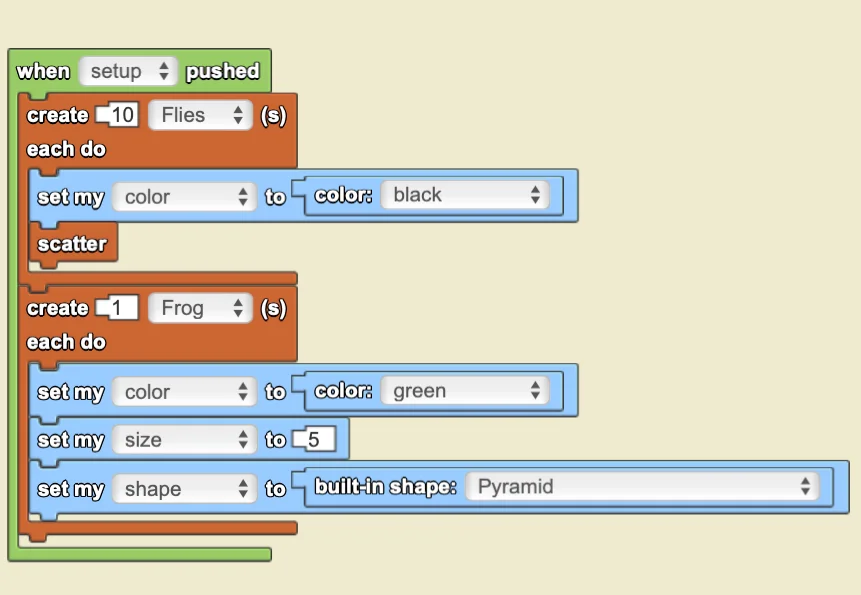
Check Your Progress!
Click "Run Code", then every time you click "setup" you should see 10 more Flies and 1 more Frog (although the Frogs will all be in the same spot because they are not scattered like the Flies are).
Part 4: Setup - Reset the Model
In this section you will add code so that each time you click the "setup" button, SpaceLand will reset.
Delete Old Agents
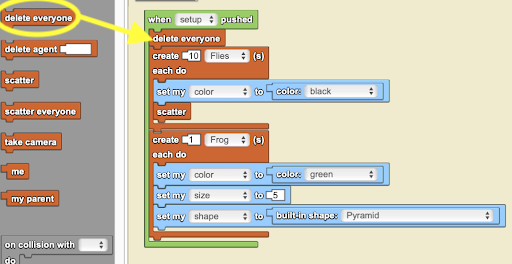
- Make sure you're still on "The World" tab.
- Open the Agents drawer.
- To make sure all old agents are deleted when "setup" is pushed:
- Drag the "delete everyone" block inside the "when ___ pushed block" but before the "create ___ do" block.
Check Your Progress!
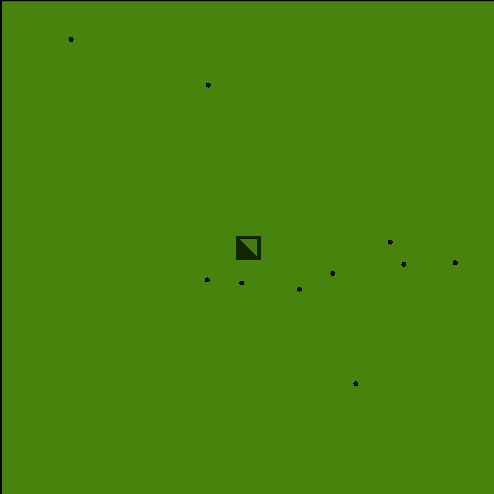
Click "Run Code", then every time you click "setup" you should see only 10 flies and 1 Frog, because the previous ones were cleared before new ones were added.
Part 5: Creating and Editing Button Widgets
In this section, you will make new button widgets -- "Fly Around" and "Catch Flies!". In the next section, you will assign functions to these buttons.
1. Rename a Button Widget
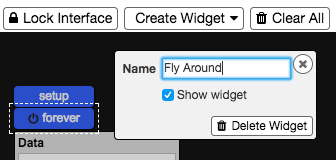
- Click on the "Edit Interface" button on the bar above SpaceLand.
- Click on the "forever" button and type "Fly Around" in the box labeled "Name".
- Click the "(X)".
2. Create a New Toggle Button Widget
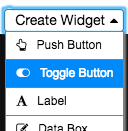
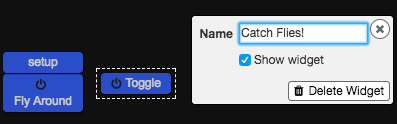
- While still in "Edit Interface" mode, click the "Create Widget" button.
- Click the button labeled "Toggle"
- Drag it to an appropriate place and name it "Catch Flies!"
- Click on the "Lock Interface" button to exit "Edit Interface" mode.
There is a large variety of widgets. You will frequently use "Toggle Button" and "Push Button" to control your program. Other options such as "Labels" and "Graphs" allow you to display information to the user. "Data Boxes" and "Sliders" can be used to either display information or take input from the user. Blocks used to interact with these widgets are in the Interface drawer.
Check Your Progress!
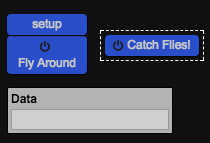
You should see four Widgets in SpaceLand -- "Catch Flies!", "Fly Around", "setup", and "Data"
Part 6: Fly Movement
In this section, you will make the Flies move around SpaceLand.
1. Program the Flies to Respond to the Fly Around Button
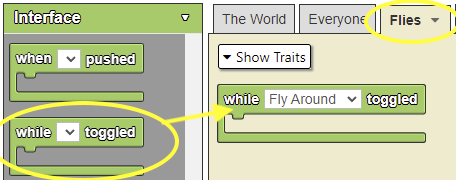
- Go to the "Flies" tab in Workspace -- any code here is only followed by the Flies.
- To connect the "Flies" actions to a toggle button:
- Open the Interface drawer.
- Drag out the "while___ toggled" block and select the "Fly Around" option from the drop-down menu.
The "while___ toggled" block tells the Flies what to do while the specified toggle button is toggled on.
2. Program the Flies' Movement
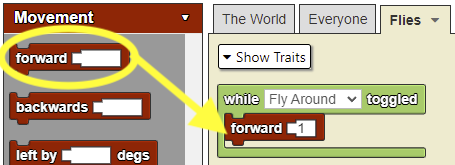
- To have the "Flies" move while the "Fly Around" button is toggled on:
- Open the Movement drawer.
- Drag a "forward" block and connect it to the "while___ toggled" block.
- Type "1" in the socket of the "forward" block -- this means the flies will move one step at a time.
The "1" tells each Flies agent to take 1 step during each tick (The StarLogo clock ticks 5 times per second when it is running at default speed). A higher number of steps will make it appear as though the Flies are moving faster.
Check Your Progress!
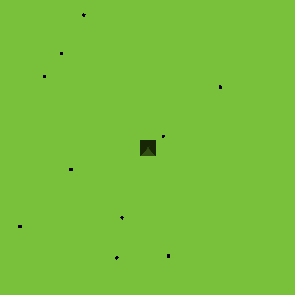
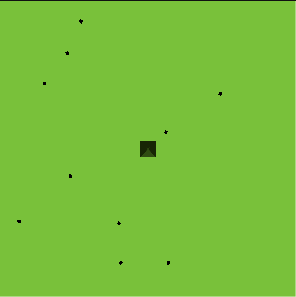
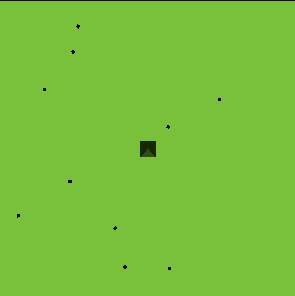
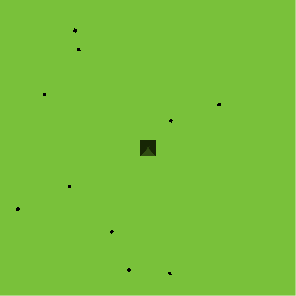
Click "Run Code", "setup", then "Fly Around". You should see the Flies moving.
Part 7: Frog Movement
In this section, you will make the Frog move around SpaceLand.
Practice What You've Learned!
Use the skills and knowledge you learned in Part 6 to program the Frog's movements. Program the Frog agent to move at 3 steps at a time when "Catch Flies!" is toggled on.
Show Solution

Check Your Progress!
Click "Run Code", "setup", "Fly Around", then "Catch Flies!". You should see the Frog moving from side to side.
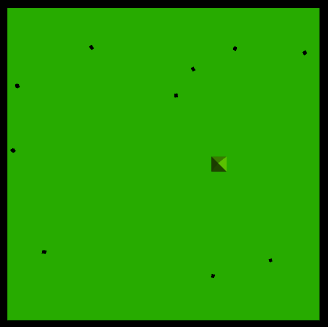
Right now, if a Fly collides with your Frog nothing happens. In the next part we will create the code for a collision between the Frog and the fly. By doing so, the Frog will "eat" the fly when they collide.
Part 8: Collisions
In this section you will write code so that when the Frog and a Fly collide, the Frog "eats" the Fly. You will also add code to the Everyone page so that all other collisions result in the agents bouncing off each other.
1. Program the Collision
- Navigate to the Frog page.
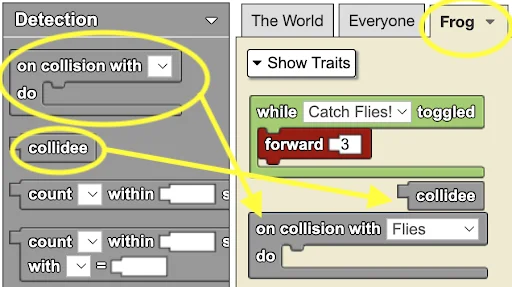
- Open the Detection drawer.
- To program what will occur when the Frog collides with a Fly:
- Drag the "on collision with ___" block onto the Frog page
- Select "Flies" from the drop-down menu on the "on collision with ___" block.
- Pull out the "collidee" block; you'll need it in the next step.
The "on collision with ___" block tells the agent whose page it is (in this case the Frogs) what to do when they bump into an agent of the selected breed (in this case the Flies).
2. Program the "Eating" of the Fly
- Navigate to the Agents drawer.
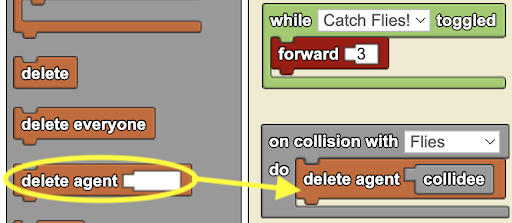
- To delete the Fly that collides with the Frog:
- Drag the "delete agent" block into the "on collision with ___" block
- Connect the "collidee" block into the "delete agent" block.
The "collidee" block represents the other agent in a collision. So the code above tells the Frogs that whenever a Frog collides with a Fly, the Frog should delete that Fly.
3. Program Everyone to Bounce off Everyone Else
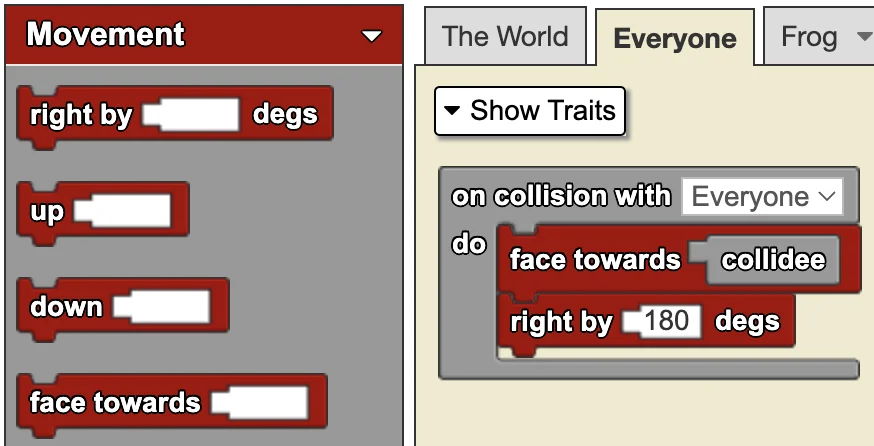
- Navigate to the Everyone page -- code on this page will be followed by all agents.
- Drag an "on collision with ___" block (from the Detection drawer) onto the page and select "Everyone" in the dropdown.
- Open Movement drawer
- Drag a "face towards ___" block into the collision block.
- Drag a "right by ___ degs" block and connect it below the "face towards ___". Set the turning amount to 180 degrees.
- Open Detection drawer
- Drag a "collidee" block into the empty socket of the "face towards ___" block.
Because this is on the Everyone page, everyone--both Frogs and Flies--will follow the instructions. This means that for Frog-Fly collisions, two sets of code will run -- the "eating" code and the "bouncing off" code. StarLogo Nova doesn't have a "face away" block. So instead, the agent faces toward the collidee, then turns right 180 degrees. Now it is facing away from the collidee! Figuring out how to use a group of smaller steps to accomplish a larger goal is the central challenge of computer programming.
Check Your Progress!
Click "Run Code", "setup", "Fly Around" and "Catch Flies", you should see Flies being "eaten" by Frogs as they collide. You should also see Flies bouncing off of other Flies if they collide with each other.
Part 9: Adding a Graph
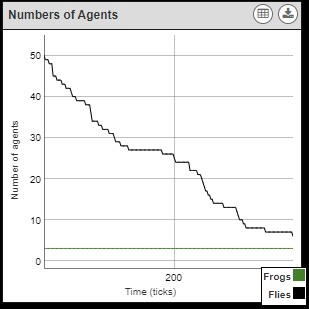
In this section you will add a line graph to track the number of frogs and flies as the numbers change over time.
1. Create a Line Graph Widget
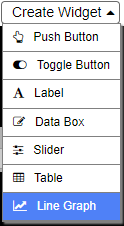
- Click on the "Edit Interface" button on the bar above SpaceLand.
- Click on "Create Widget" and select "Line Graph".
- Drag the graph to the screen so it doesn't cover other widgets or the green terrain square.
2. Configure the Graph
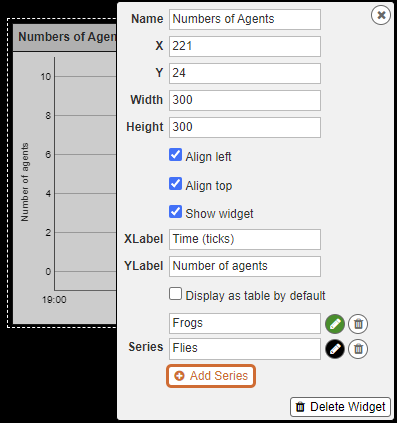
- Click on the graph to open its configuration window.
- Give the graph a name and good X and Y axis labels.
- Rename the first series to Frogs.
- Click the "Add Series" button to add a second series, and rename it to Flies.
- Use the color selectors to choose colors for the lines that will represent Frogs and Flies.
- Click the "Lock Interface" button.
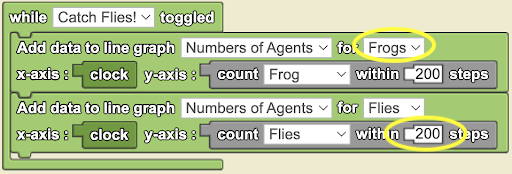
3. Update the Graph Data Every "Tick" of the Clock
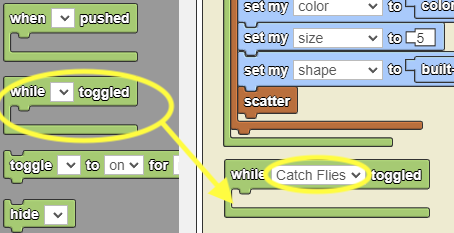
- Navigate to The World page.
- Open the Interface drawer
- Drag out a "while _ toggled" block and choose "Catch Flies".
- Drag the "add data to line graph" block and connect it to the "while _ toggled" block.
- Open the Environment drawer.
- Grab the "clock" block and connect it to the "add data to line graph" block as shown.
- Open the Detection drawer.
- Grab the "count ___ within ___ steps" block and connect to the "add data to line graph" block as shown.
- Make two sets of these blocks -- one for Frogs and one for Flies.
The reason for 200 steps is that SpaceLand is only 101 steps across, so 200 steps is more than enough to include everyone.
4. Clear the Graph when the Model is Setup
- Find the code that sets up the model on The World page.
- To make it so the graph is cleared and starts over at zero ticks each time you click setup:
- At the bottom of this code, add a "clear line graph ___" block (from Interface) and "set clock to ___" block (from Environment) as shown.
Check Your Progress!
Run your model, check that the line graph resets when "setup" is clicked and updates as the model is running.
Part 10: Extensions
If you have time, try some extensions from the list below to develop your simulation. The extensions tend to progress from easy to hard tasks. Some of them require new skills and blocks that you have not used before. Also, feel free to explore/try different things not included here on your own.
You may want to click the "Remix" button at the top of your project page before trying these. It saves a new copy of your project so you can go back to the working version if something you try doesn't work as expected.
- Add more Frogs in different locations, and make them different colors.
- Easier: Use multiple "create___each do" blocks.
- CHALLENGE: Do this using only the create block you already have, with additional blocks attached inside.
- Frog-like movement: Use blocks from the Movement drawer to make the Frogs turn and move around in a more frog-like manner in SpaceLand. Use the "yield" block (from the Logic drawer) to make the frogs pause between movements, to look more like they are hopping.
- Make Frogs get bigger each time they "eat" a Fly.
- Flying speed slider: Make a slider widget called "flying speed" and use it to determine how far the Flies move each time. (HINT: use a "___ slider value" block from the Interface drawer.)
- Score tracking: Program the Data databox to keep track of how many Flies the Frog has eaten. (HINT: use a "set data ___" block from the Interface drawer.)
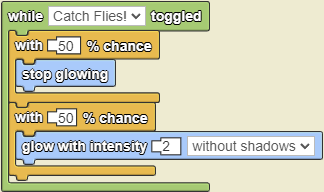
- Fireflies: Use the experimental new "glow" blocks in the Traits drawer to turn the flies into fireflies! You may also want to reduce the intensity of the directional light and the world glow to 0 (both blocks in the Environment drawer) to make it feel more like nighttime. (Make sure to change the Flies' color from black to a different color so the glow effect is visible).
Copyright 2024 MIT Scheller Teacher Education Program. Distributed under Creative Commons license CC BY-NC 4.0.