1. Orientation

You will learn the parts of the StarLogo Nova interface and program your first StarLogo Nova project, which uses multiple agents to draw a flower.
Learning Objectives
- Register for an account
- Navigate to profile
- Create a new blank project
- Change the name of a project
- Save and Run code
- Use tabs to switch between different pages
- Drag blocks from the drawer
- Connect blocks to create a program
- Create more than 1 agent
- Use movement blocks
- Draw on the terrain
- Identify parts of the interface
- Distinguish between push and toggle buttons
- Explain how movement blocks affect turtle agents in different interface blocks
New Terms
Workspace • SpaceLand • Drawers • Blocks • Widgets • Terrain • Agent • Breed of agents • 3D Model • Tab • Page • Interface • Toggled • Loop • (x, y) coordinates
Part 1: Create a StarLogo Nova Account and Log In
1. In a web browser with an internet connection, navigate to staging.slnova.org (No 'www' -- just 'staging'.)

- If you already have a StarLogo Nova account, skip the next step.
2. If you do not yet have an account, click the Register link and follow the directions.

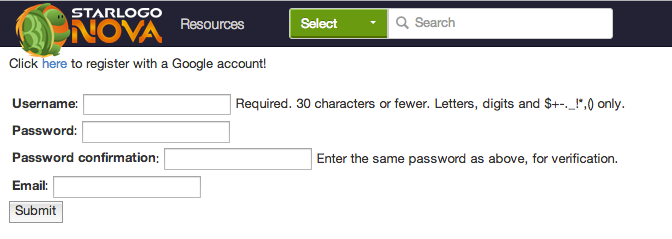
- You can create a new username + password OR register with a Google account. Email is optional -- if provided, we use it ONLY for password recovery.
3. Create a new project
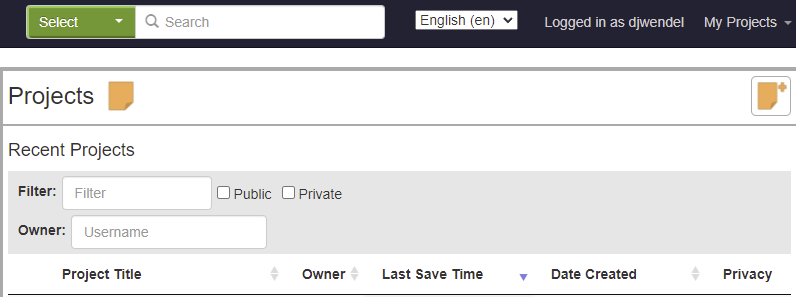
- After login is successful, on the projects page, click on the button to create a new project. It looks like a piece of paper with a plus symbol.
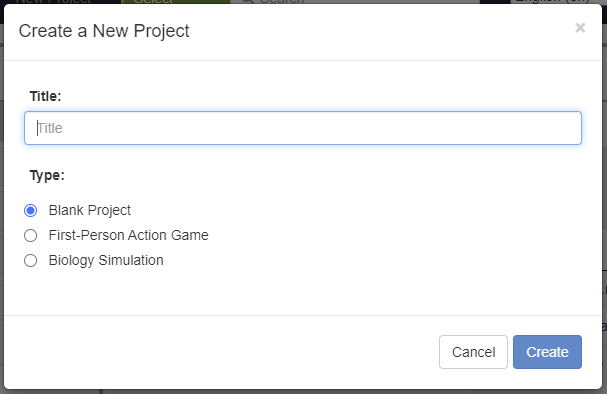
- Choose a title for your project, select "Blank Project", and click "Create".
Part 2: StarLogo Nova Interface
StarLogo Nova has two main parts:
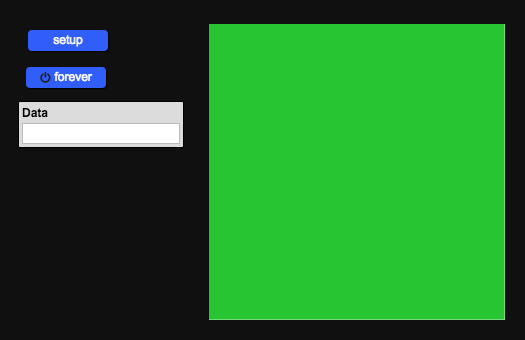
1. The top part, called SpaceLand, is a 3D world where agents follow the programs. It consists of a green flat plane (called the terrain).
Note that it has several buttons. The "setup" button, "forever" button and "Data" box are called "widgets".
2. Programming is basically putting together a logical sequence of directions.
The bottom part, called the Workspace, contains drawers of blocks that represent the programming commands, and pages where you snap the blocks together to write programs.
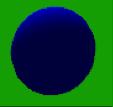
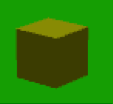
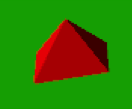
3. An agent is represented by a 3D model. You can select from simple built-in shapes or a library of 3D models.
Basic Orientation
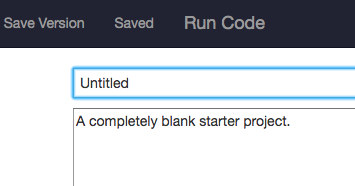
4. If you want, you can change the project title by typing in the box near the top of the page. It will auto-save your changes.

- Scroll down to the Workspace and you will see tabs with the names: "Turtle", "Everyone", "Patch", and "The World". Click on the different tabs to switch between pages.
- Click on the "The World" tab and prepare to create some agents.
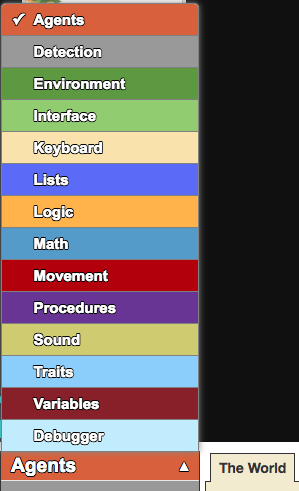
- On the left you will see the drawers. Click on a drawer name to open that drawer to see the blocks within.
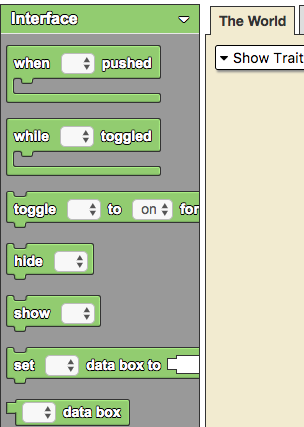
- Open the Interface drawer. In the next part, you will drag blocks from the drawers to build a program.
The drawers each represent a set of related blocks a programmer may use in StarLogo Nova.
Part 3: Create Agents
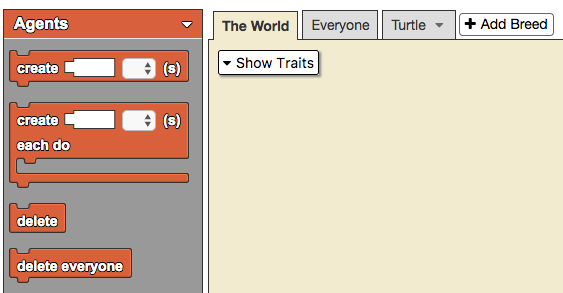
A blank project comes with one breed called Turtle and a "setup" button. In this part, you will program The World to create Turtle agents when the user clicks the "setup" button.
1. Dragging a Block
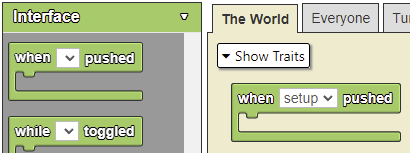
- Drag the "when___pushed" block from the Interface drawer onto the World page and select "setup" from the drop down menu.
2. Creating your Turtle Agents
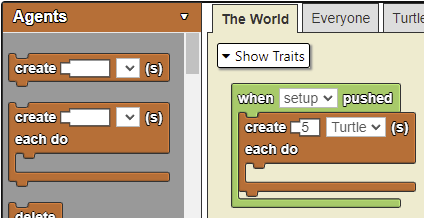
- Open the Agents drawer
- Create 5 Turtle Agents by dragging the "create___each do" block and placing it inside the "when___pushed" block.
- Type "5" in the socket of the "create___each do" block and select "Turtle" from the drop down menu
- Scroll up to SpaceLand and check your progress by clicking "Run Code" then click the "setup" button. You should be able to see a tiny gray/white blob in the middle of SpaceLand.
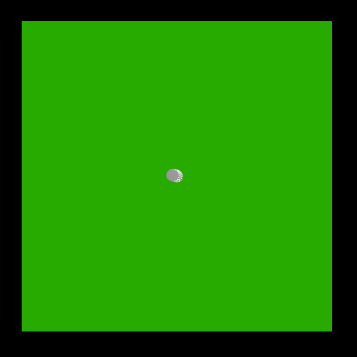
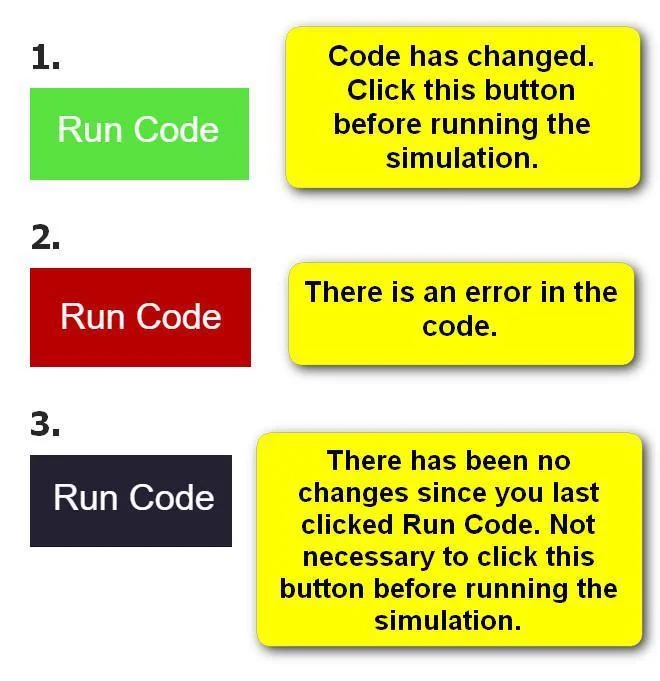
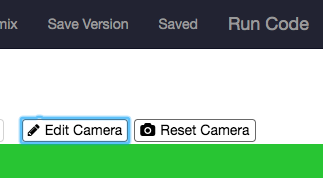
- You can zoom in to see the agents by first clicking the "Edit Camera" button
- Then scroll to zoom out or in, or right-click and drag to rotate the view. You can then lock the view by clicking the "Lock Camera" button.
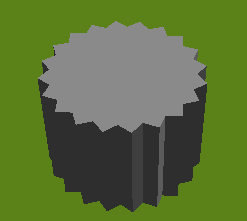
- You can drop blocks onto the pages to make that breed of agents follow the programs on that page. In this case, "The World" will be creating the turtles.
- The "when___pushed" block executes commands when the push button widget is pushed.
- The "create___each do" block creates agents of the selected breed and tells each of the newly created agents to do specific commands right away.
3. Turtle Movement
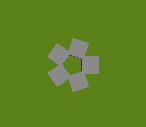
Where are the 4 other agents? When created, all the agents begin at the same starting position in the middle of SpaceLand.
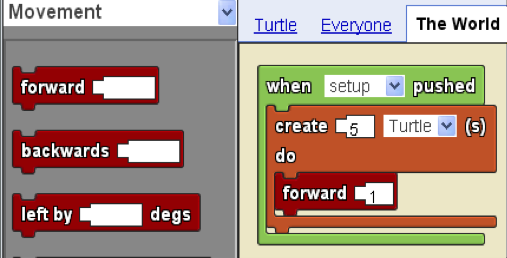
- Try to program the turtle to each take 1 step forward as soon as they are created.
- Open the Movement drawer
- Drag the "forward___" block and place it inside the "create___each do" block
- Type "1" into the "forward___" block
- Check your progress by clicking "Run Code" then the "setup" button.
4. Delete Previous Agents
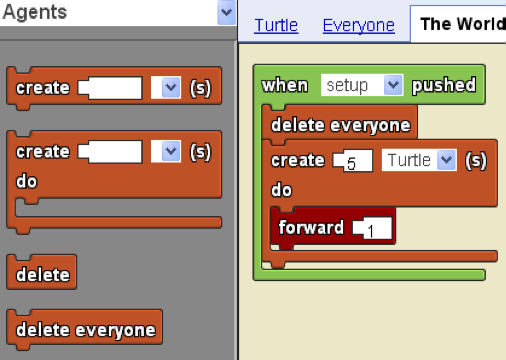
Every time you click the "Setup" button, five more agents will be created, overlapping the original ones. To fix this, delete the previously created agents before creating new ones.
- Open the Agents drawer
- Drag the "delete everyone" block and place it above the "create___each do" block, still inside the "when___pushed" block
Check your progress by clicking "Run Code" then the "setup" button repeatedly. You should see only 5 turtle agents in SpaceLand each time.
5. Drawing on the Terrain
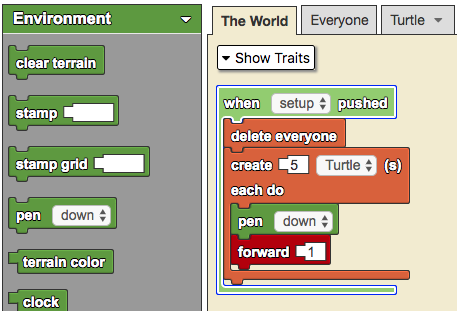
Prepare your turtle agents to draw on the terrain by telling them to each put their pen down.
- Open the Environment drawer
- Drag the "pen down" block and place it above the forward 1 block.
Check your progress by clicking "Run Code" and then the "setup" button. If you zoom in, you should see the 5 turtle agents leave a white color patch at origin (where they started), and spread out after they take a step forward.
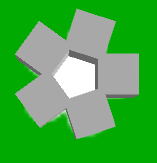
The "pen down" block tells agents to leave behind a trail of color as it moves. The color of the trail corresponds to the color of the agent.
Part 4: Draw a Flower
In this part, you will make the Turtles draw a flower as they are moving.
1. Program the Turtle Agents
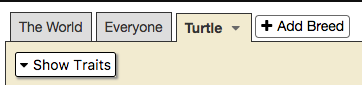
- Go back to the Workspace and open the Turtles page.
- The Turtle agents will run the programs you create here
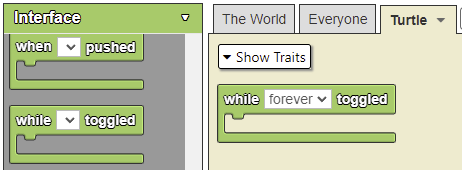
- Open the Interface drawer
- Drag the "while___toggled" block onto the Turtles page
- Select "forever" from the drop down menu on the "while___toggled" block
2. Make the Turtle Agents Move in a Circle
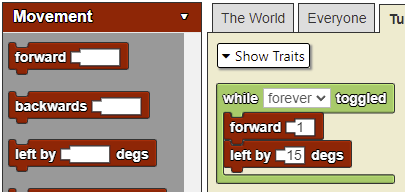
- Open the Movement drawer
- Drag the "forward___" block on the Turtles page and place it in the "while forever toggled" block.
- Type "1" in the "forward___" block socket
- Drag the "left by___degs" block and place it under the "forward___" block. (Both blocks should be inside the "while___toggled" block)
- Type "15" in the "left by___degs" block socket
The turtle agents will follow these instructions over and over, resulting in a circular path.
"Forever" is a toggle button widget, like an on/off button. When it's toggled "on", the "while___toggled" block runs all commands contained in it, in order from top to bottom, over and over again. This is also called a "loop".
3. Check Your Progress
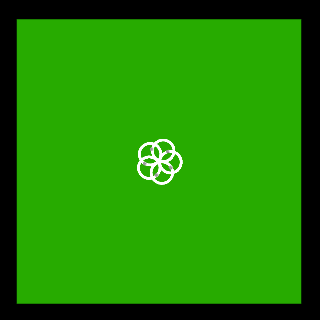
- Click "Run Code"
- Click the "setup" button.
- Click the "forever" button.
- You should see the Turtles draw 5 white circles which make a flower!
- Click on the "forever" button again to stop the simulation.
4. Reset Terrain
If you click setup again, you'll notice that the flower drawing is still on the terrain. To reset the simulation back to an all-green terrain, do the following:
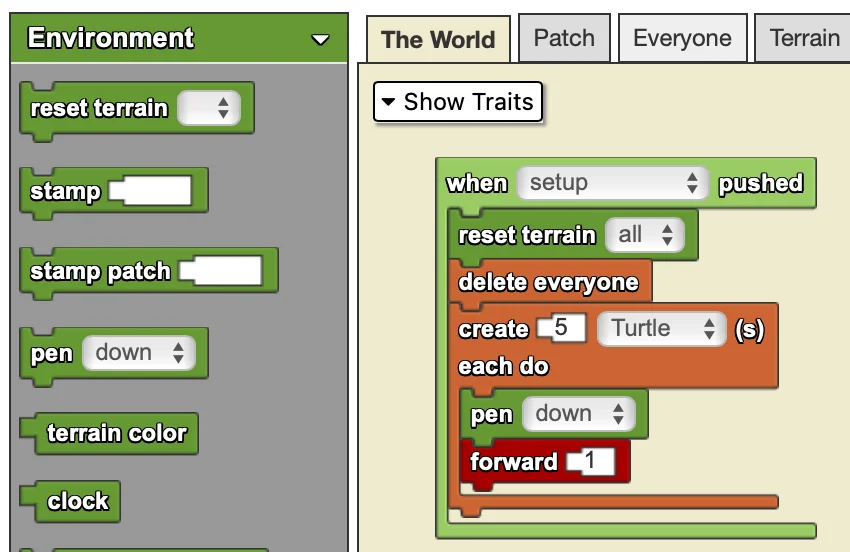
- Open the Environment drawer
- Drag a "reset terrain" block onto "the World" page
- Place the "reset terrain" block above the "delete everyone" block inside the "when___pushed block" and select "all" from the dropdown menu
Check Your Progress
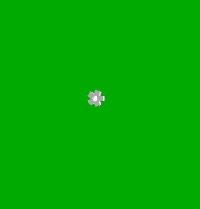
- Scroll to SpaceLand and check your progress by clicking "Run Code" then click the "setup" button.
- You should see the terrain reset to its default green color.
Part 5: Extensions
If you have time, try the following explorations:
Vary the Flower Pattern
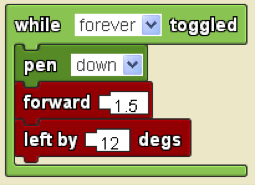
Use the existing blocks or new blocks from the Movement drawer to explore variations on the flower drawing program by changing the:
- Number of agents
- Number of degrees of the turn
- Direction of the turn
- Number of steps forward
- Direction of steps (try back instead of forward)
Change Agent Traits
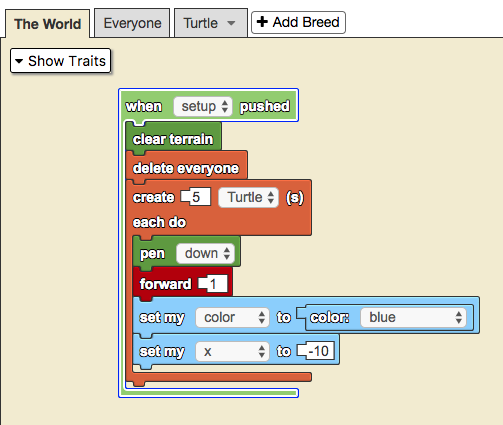
Look in the Traits drawer to use "set my___ to" blocks to change:
- Color of agents
- Size of agents
- Starting location (x, y) of agents
Challenge: Multiple Flowers
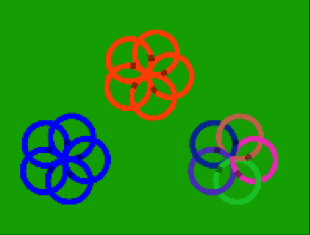
Draw 3 flowers in different locations that are different colors.
- You can have more than 1 "create___each do" block inside ONE "when setup pushed" block.
- The SpaceLand is a coordinate plane with (0,0) at the center, X goes from -50 to +50 and Y goes from -50 to +50.
By MIT Scheller Teacher Education Program. This work is licensed under a Creative Commons Attribution 4.0 License, which allows anyone to re-distribute, re-use, and modify, on the condition that the creator is appropriately credited.