5. Create Terrain

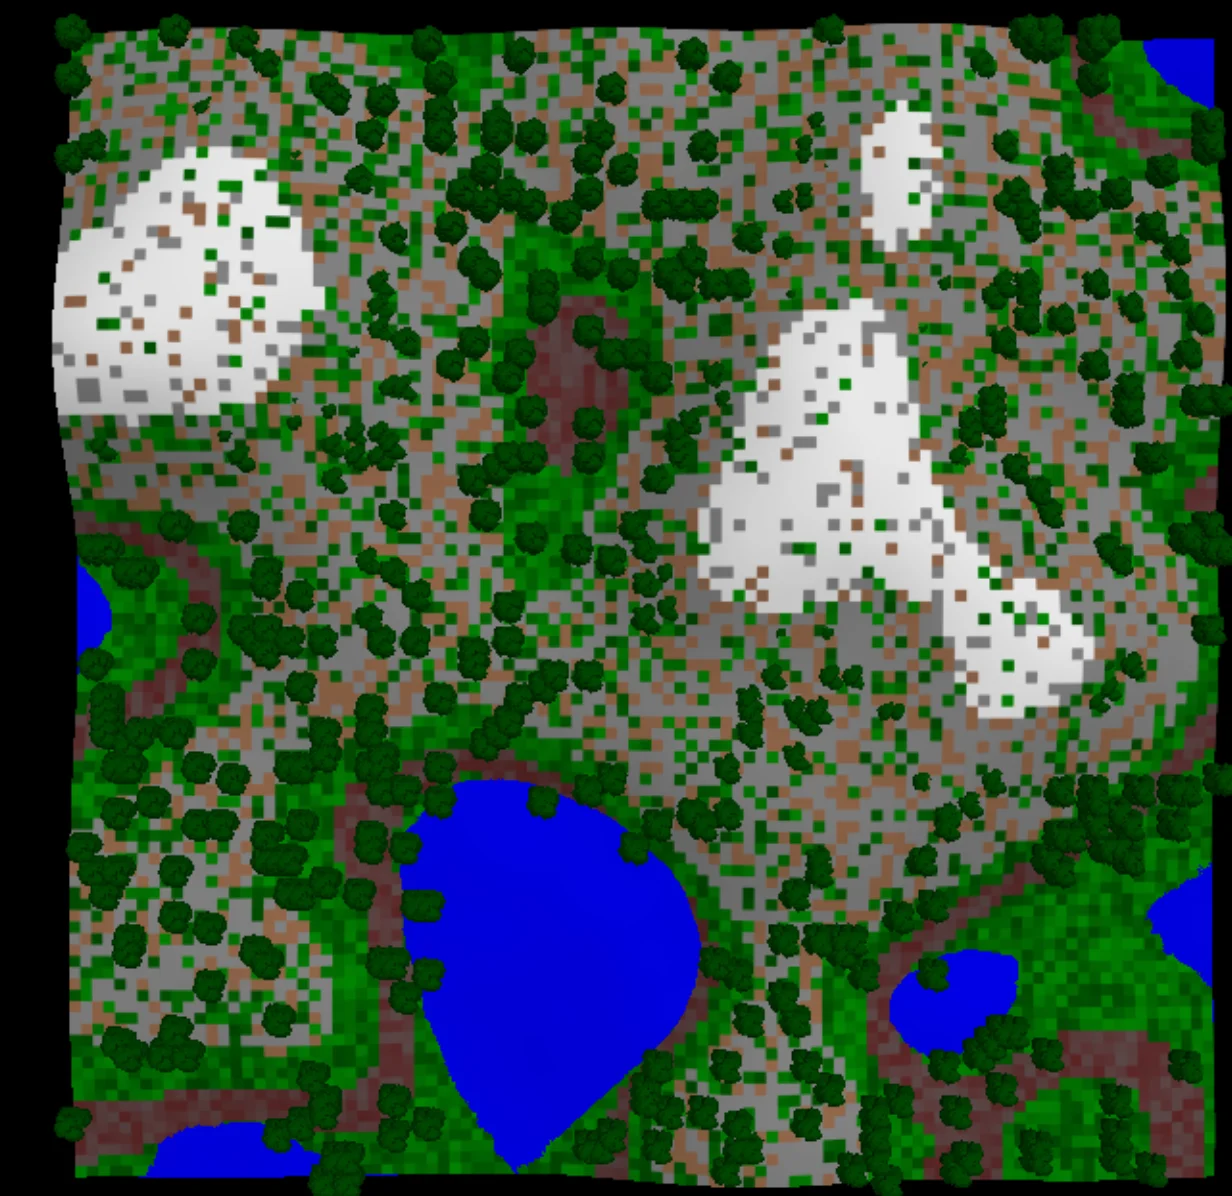
Description
In this activity, you will be creating your own terrain.
Example Project: https://staging.slnova.org/Yasmin/projects/691764/
Editing the Terrain
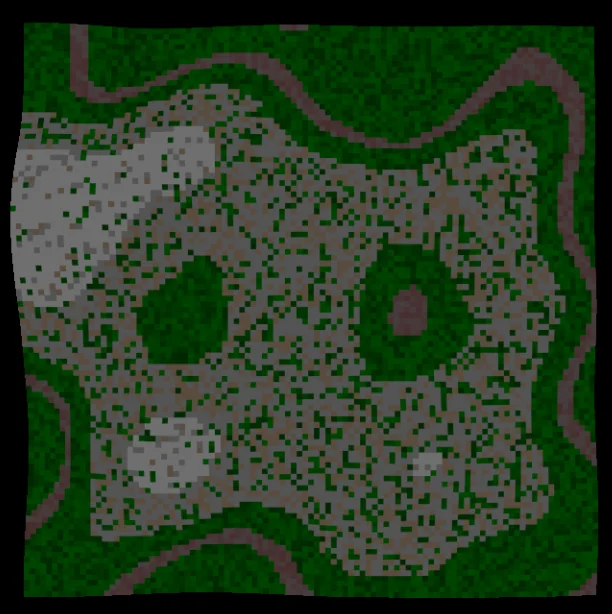
With the features in StarLogo Nova version 3, we can use blocks to make mounds and craters, better control the coloring of the patches, and adjust the lighting over the world.
Part 1: Create Hills
Helpful Coding Blocks
| Block | Drawer | Use |
|---|---|---|
 | Environment | Raises a mound in the terrain with a height given by the first input and a width given by the second input |
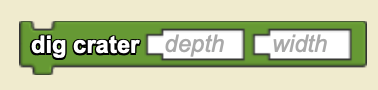 | Environment | Creates a crater with a depth given by the first input and a width given by the second input |
 | Environment | Resets Patch traits: can choose between resetting color, height, custom traits, or everything. |
Setup Code

Add a new breed and name it Terrain.
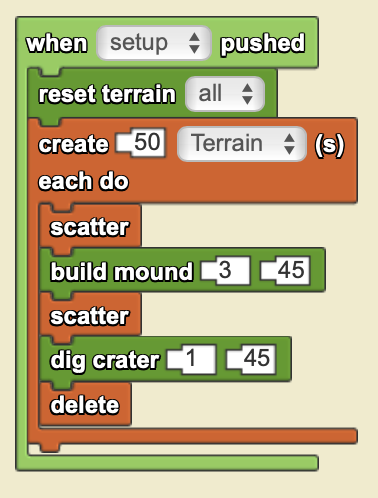
On the World page, create 50 "Terrains" that will scatter, build a mound, scatter again, dig a crater, and then delete. Make sure to reset the terrain before creating the new agents so that each time you press setup, you do not build on top of the previous hills.
Check your Progress!
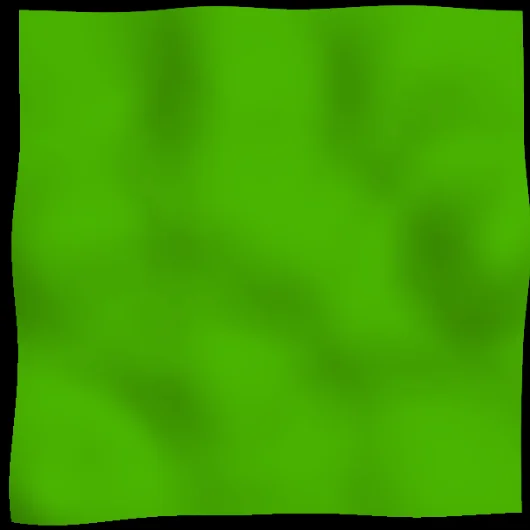
When you click setup, do you notice a warping in the terrain? Increase the height of your mounds to make the terrain more mountainous, or decrease them to make it more hilly.
Part 2: Create Lakes
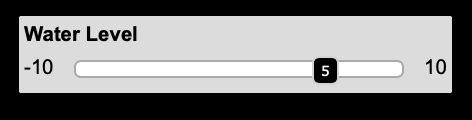
Create a new slider widget and rename it to Water Level. Redefine the bounds to be from -10 to 10.

Add a new breed and name it Water.
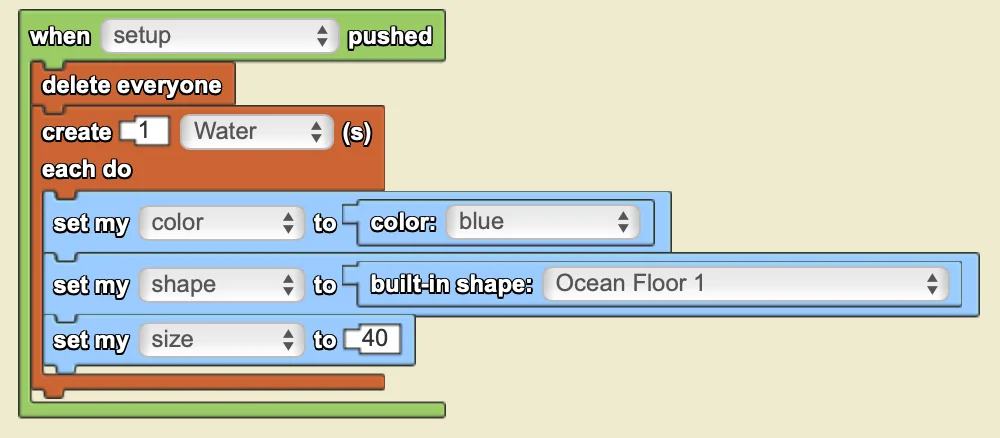
In the World page, create 1 Water. Set its color to blue, its shape to Ocean Floor 1, and its size to 40. Make sure to add a delete everyone block so that more water agents are not added unnecessarily when you click setup.
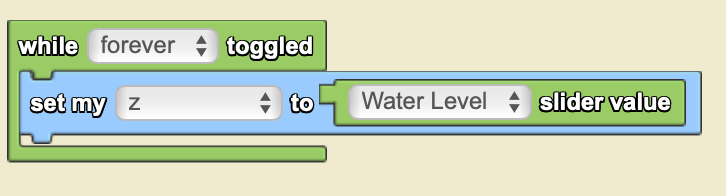
In the Water page, set its z to always be the value of the "Water Level" slider.
Check your Progress!
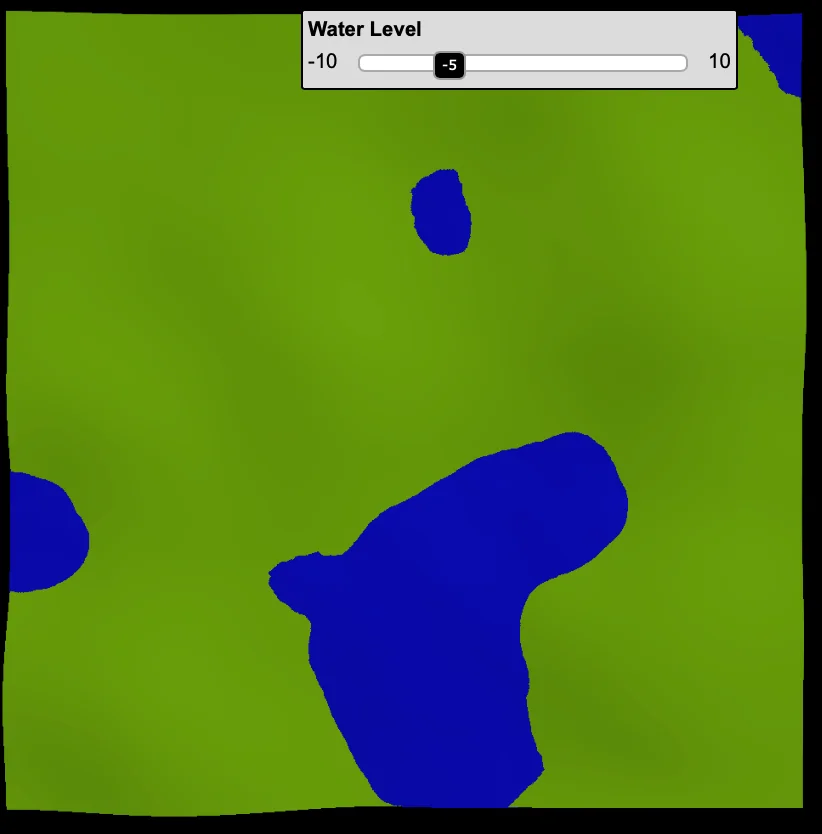
When you click setup and move the slider value, do you notice lakes appearing?
Part 3: Color the Patches
Patches represent the grids dividing the SpaceLand. SpaceLand is composed of 101x101 patches, and each patch has coordinates from -50 to 50 (inclusively), with the patch (0, 0) at the center. With the Patch features in StarLogo Nova version 3, patches can now run code. This allows us to easily control the color of patches based on their height.
Dirt Path or River

Create a new button widget and name it "Color Terrain".
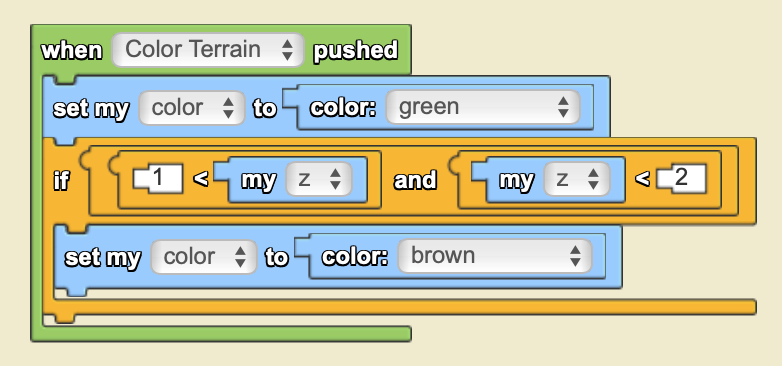
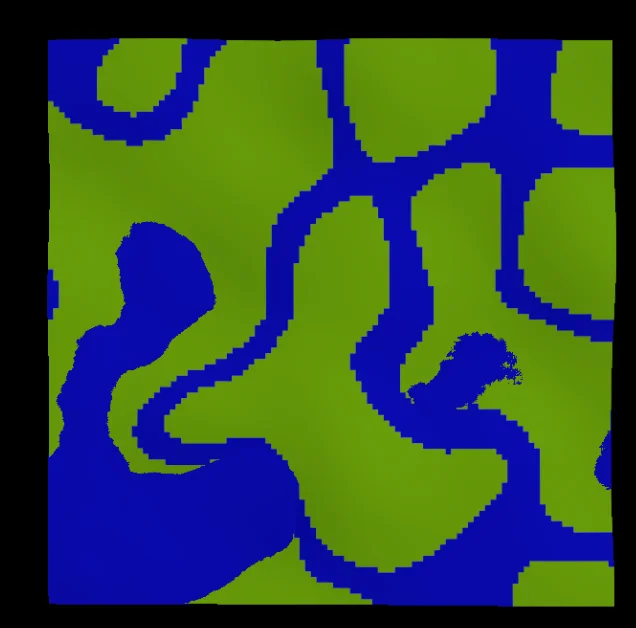
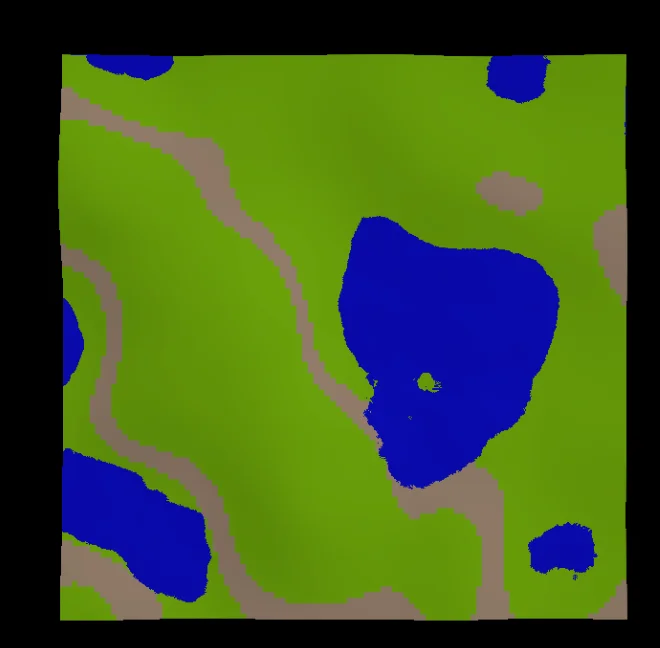
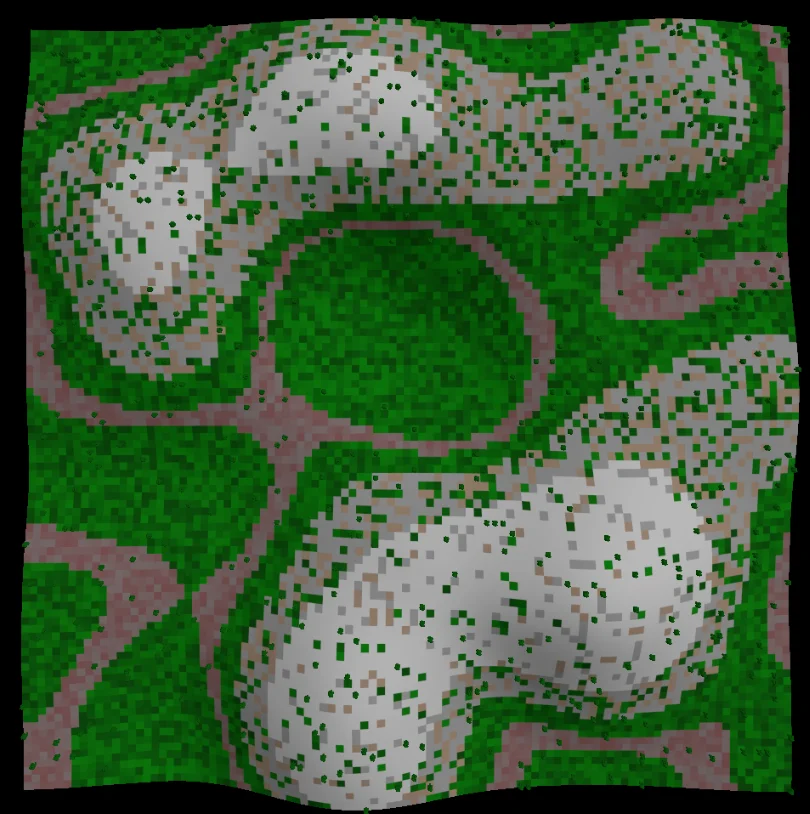
On the Patch page, set the color of the patches to be brown/blue if their z is between 1 and 2. Add a block setting the color of the patches to green beforehand so that the coloring resets each time you press Color Terrain and before you make the changes.
Check your Progress!
When you click setup and then Color Terrain, do you see a path/river in the terrain? Try adjusting the range of the path from 1-2 to something else and observe what changes.
Snowy Mountain
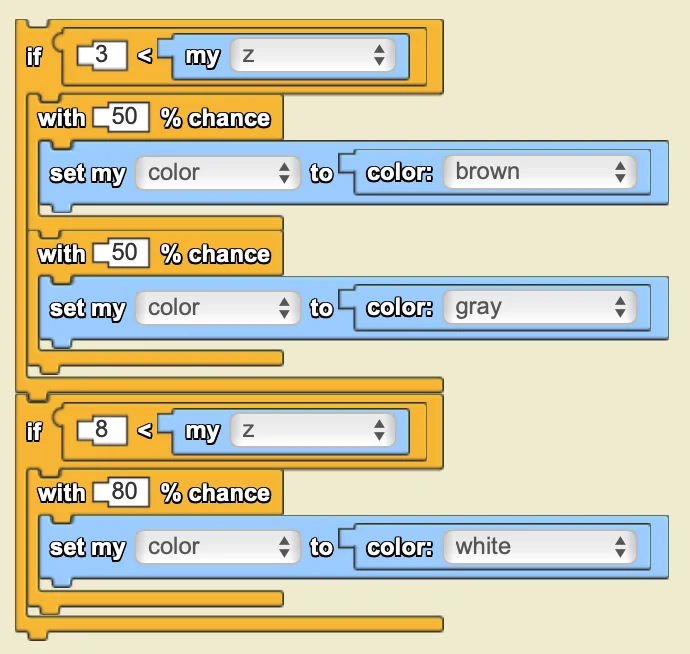
Continue adding to when "Color Terrain" pushed in the Patch page with blocks that set patches above a certain height to have a chance of being brown or gray. At a certain height above that, make the patches likely to be white.
Forest Trees
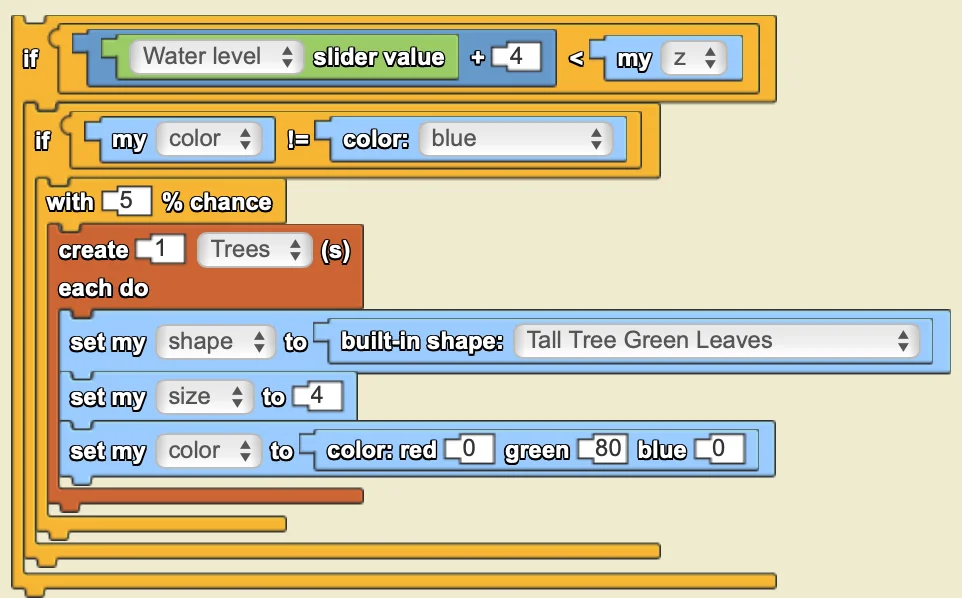
In the Patches page, inside of when "Color Terrain" pushed, add blocks that give the patch a 5% chance of growing a tree if it is above the water level and not blue (not a river). Adjust the traits of the tree to have your preferred shape, size, and color. Increase the % chance to make the trees more dense.
Check your Progress!
Click setup, adjust your slider to your preferred water level, then click Color Terrain.
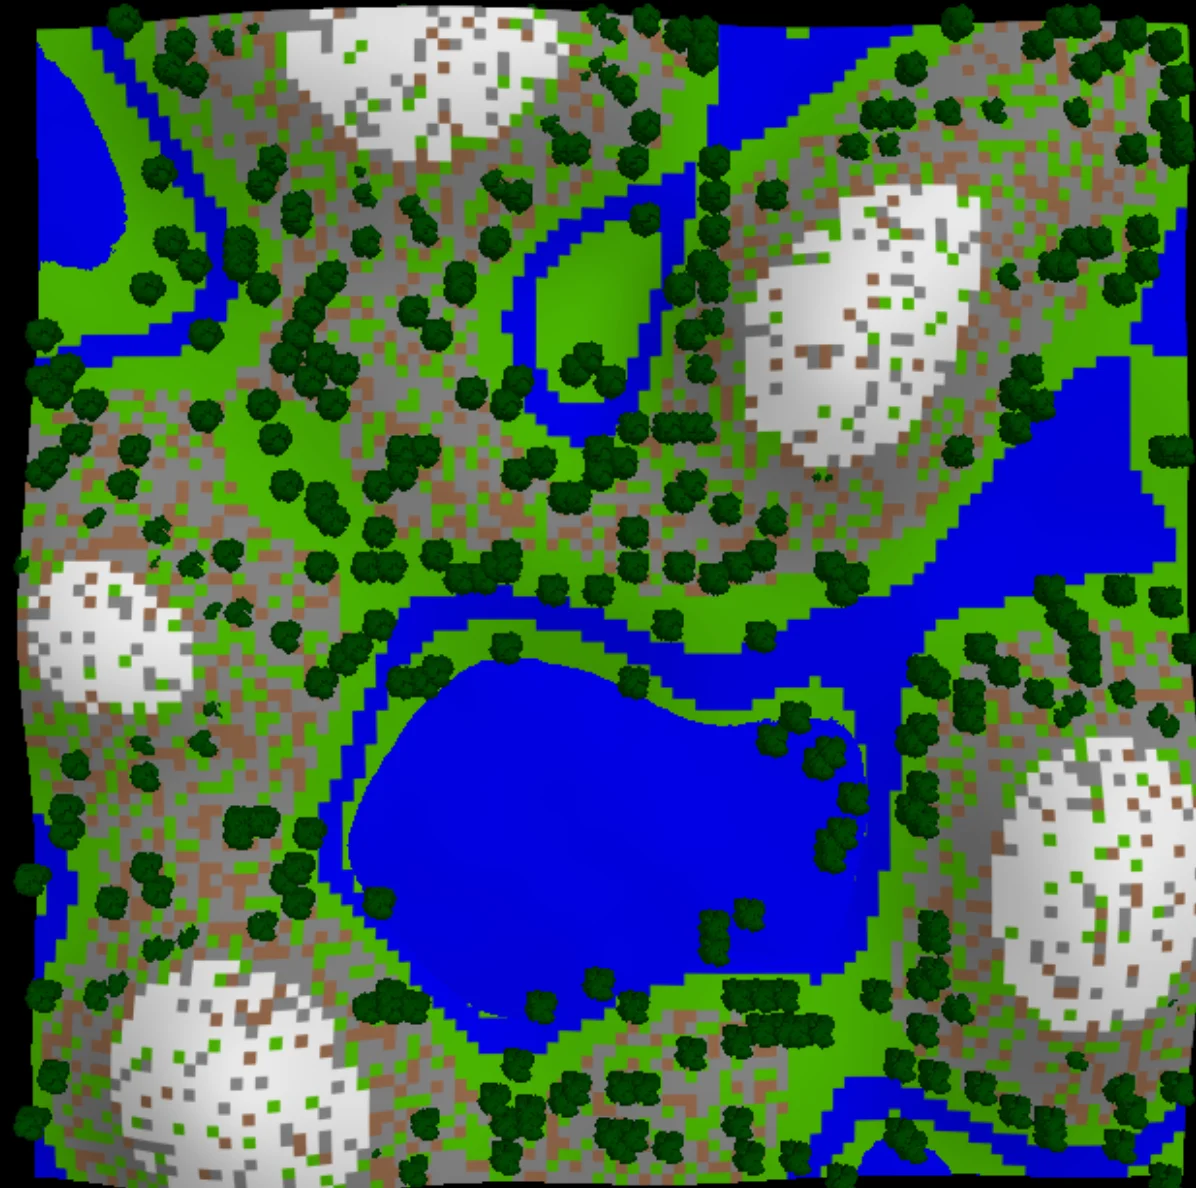
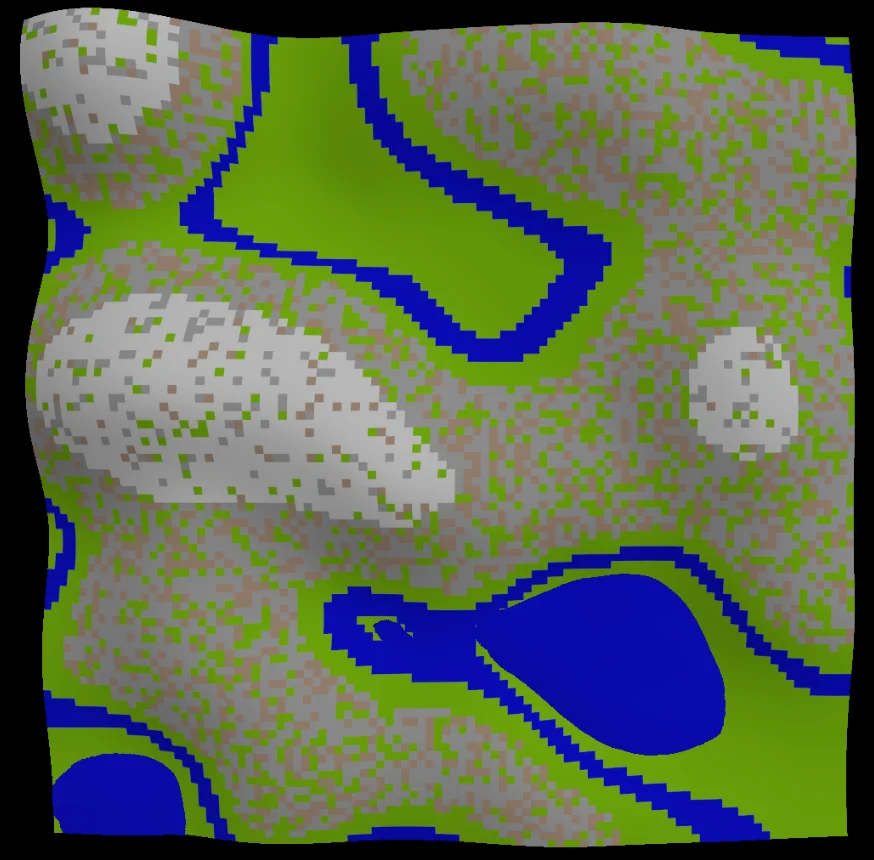
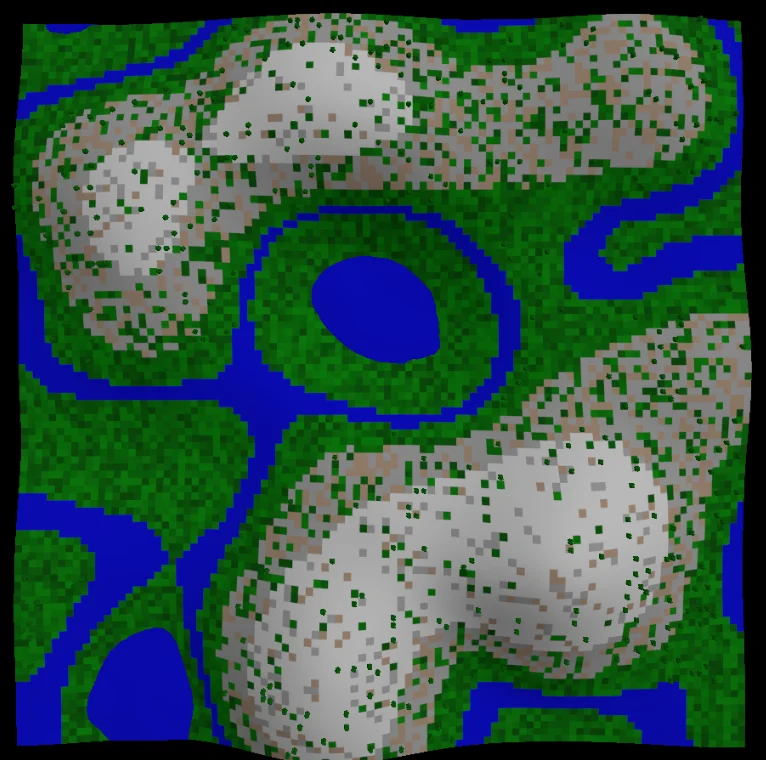
Optional: RGB Colors
Make the colors more varied or specific with the RGB block.
To make the grass be random shades of green:

To make the dirt path be random shades of reddish-brown:

Part 4: World Lighting
Helpful Coding Blocks
| Block | Drawer | Use |
|---|---|---|
 | Environment | Sets the brightness of the directional light shining on the terrain to an intensity given by the input (by default it has an intensity of 1) |
 | Environment | Changes the color of the light shining on the terrain. |
 | Environment | Sets the direction and angle of the light shining on the terrain. The heading determines which direction the light will come from (0 degrees being from the right and going counterclockwise). The angle determines the angle light hits the terrain (90 degs being directly above the terrain). |
Light Intensity
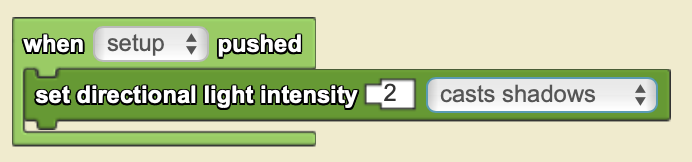
In the World page, give the directional light an intensity (the default is 1). Try with casting shadows and without and observe the difference.
Day/Night Cycle
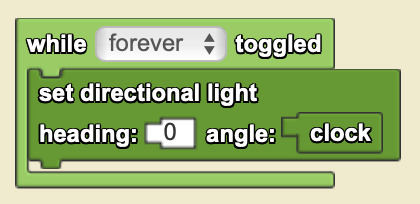
In the World page, continuously update the angle of the directional light by setting its angle to be clock while forever is toggled. This makes the directional light rotate across the world with every engine tick, creating a night and day effect.
Daytime/Nighttime Toggles
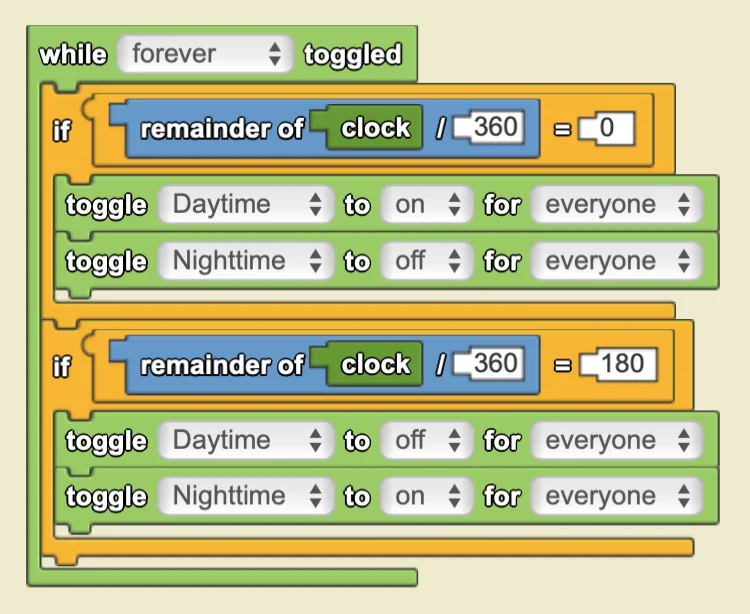
Create two new toggle button widgets and name them Daytime and Nighttime. Set Daytime to be toggled on when the angle of directional light is 0 and Nighttime to be toggled on when the angle of the light is 180.
Sunset/Sunrise Colors
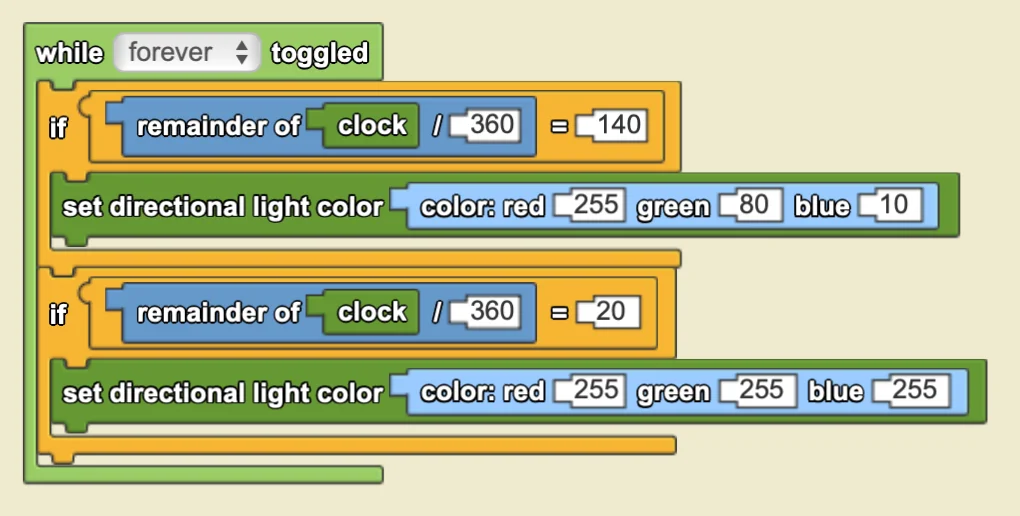
During sunrise and sunset, sunlight appears more orange because it passes through more of Earth's atmosphere, scattering away more blue and green wavelengths. To create a similar effect in the simulation, set the directional light RGB to (255, 80, 10) when the angle of light is 140 (right before sunset) and back to white (255, 255, 255) at 20 (right after sunrise).
Check your Progress!
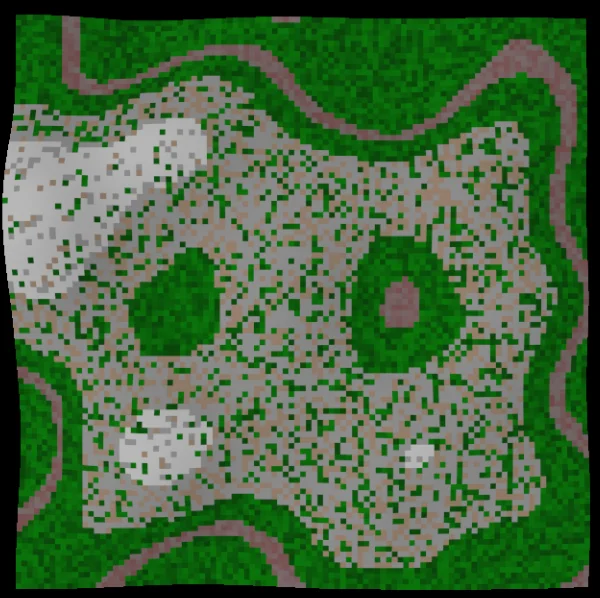
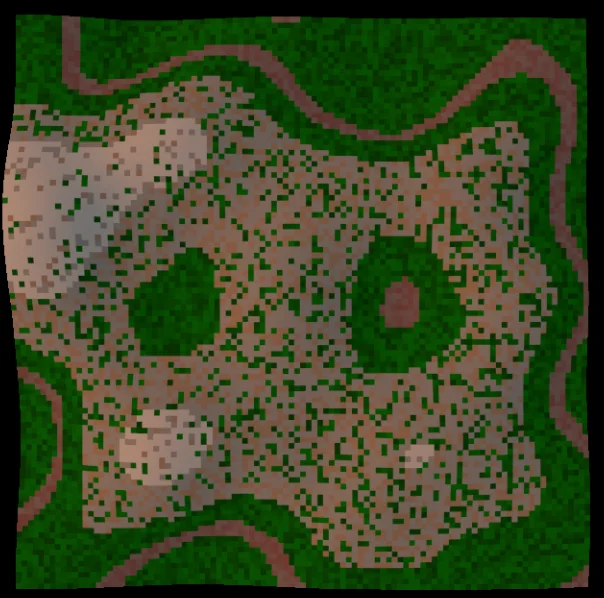
When you have forever toggled, do you notice the difference between daytime, evening, and nighttime? Try increasing the engine speed to speed up the night/day cycle.

Daytime
Evening
Nighttime
Optional Extensions
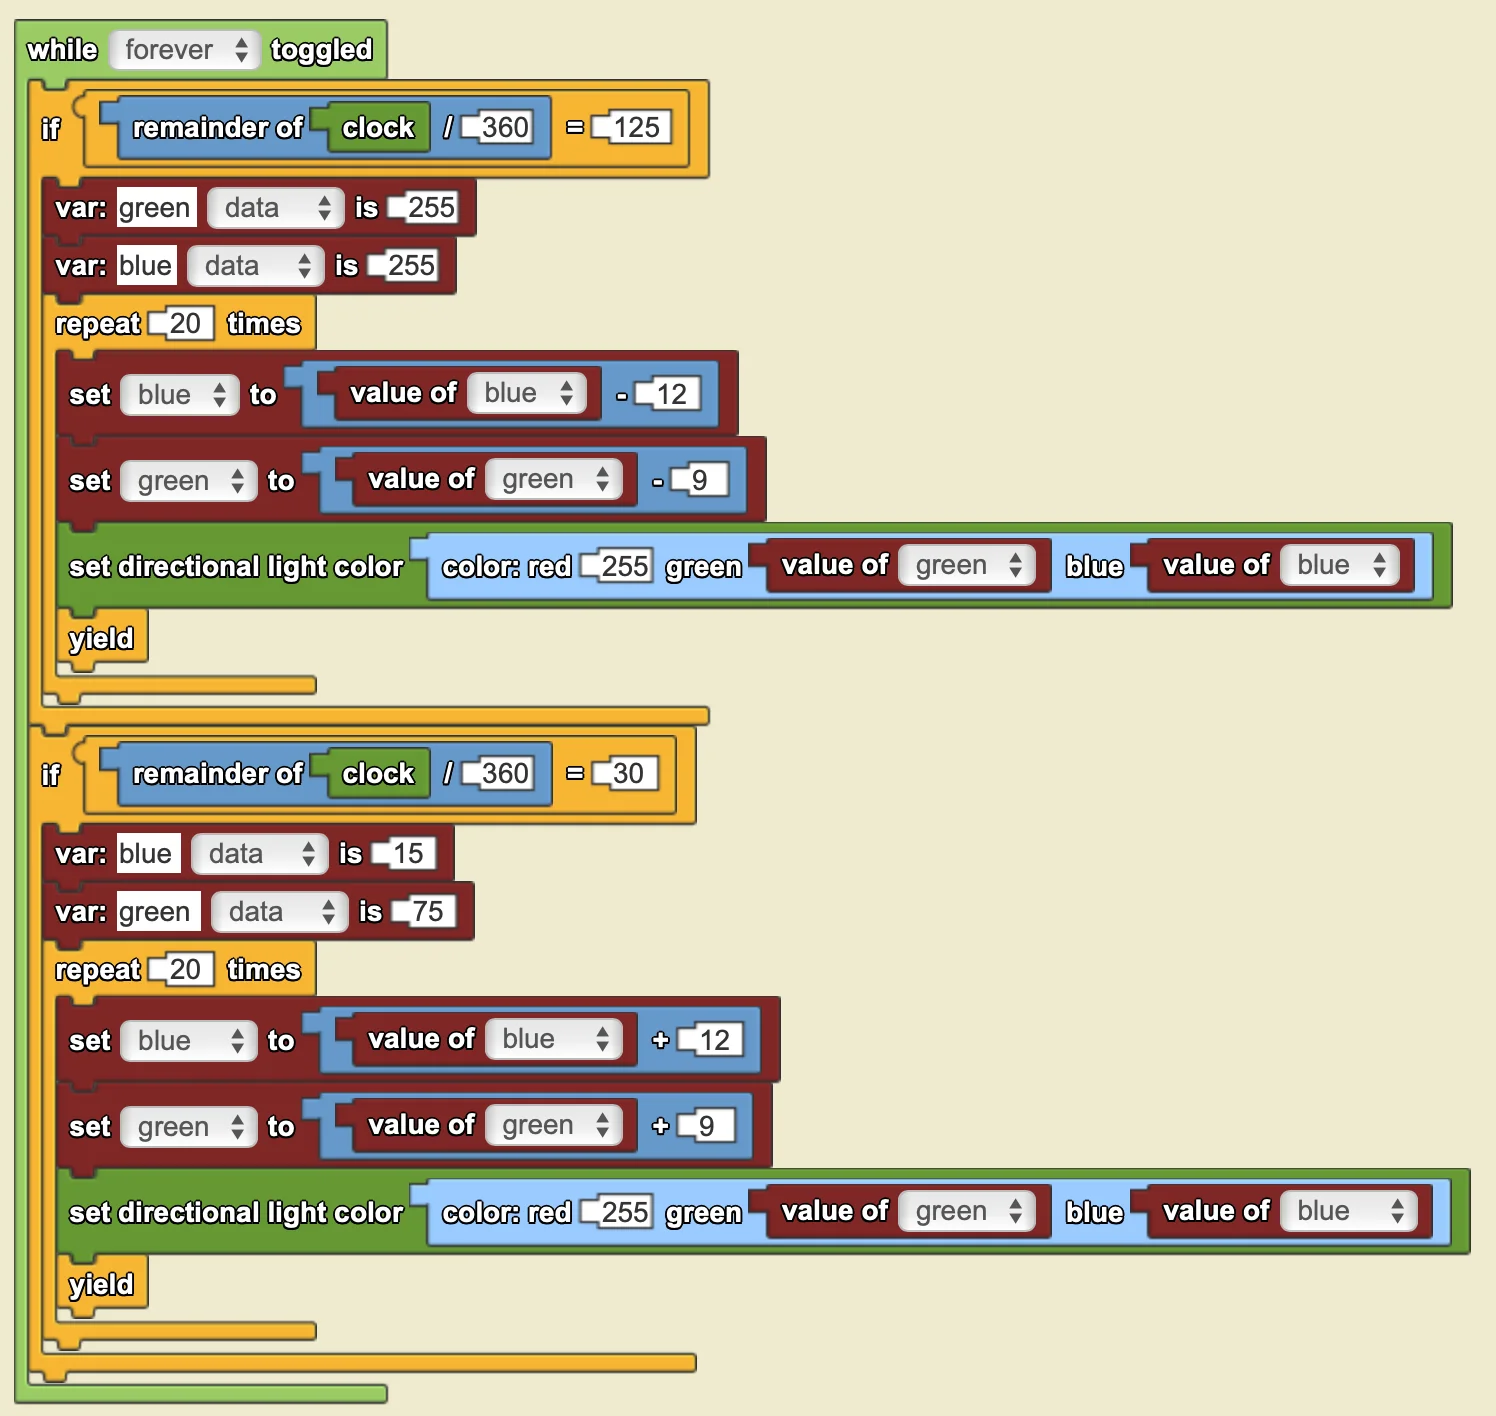
Gradual Sunset/Sunrise Transition
Make the color transition during sunset and evening gradual.
Use variables, yield, repeat blocks, and the RGB block. At a certain time (light angle) decrease/increase the green and blue value of the light by a certain amount, yield, and then repeat many times (make sure to keep the RGB range 0-255).
Agent Day/Night Behavior
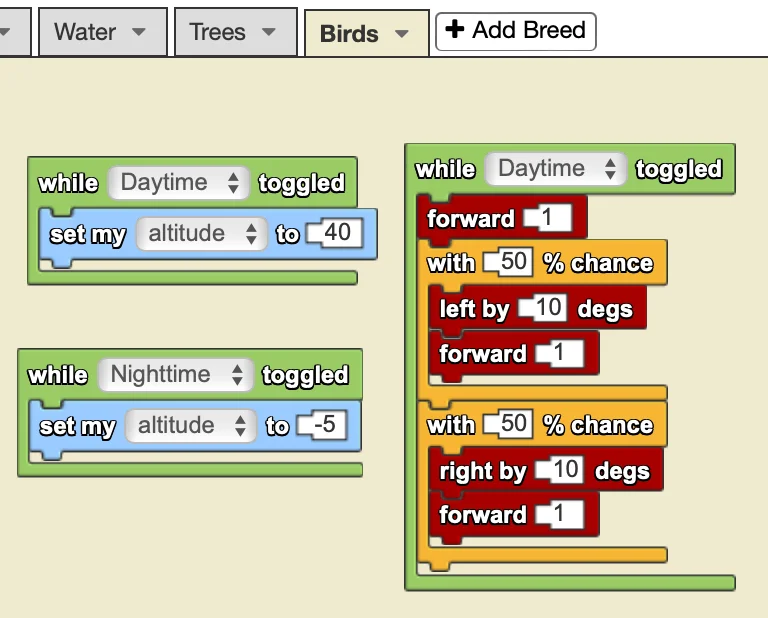
Add agents that have different behavior during Nighttime vs Daytime. For example: Birds that fly around during the day, but sleep in a tree during the night.
Use the while Daytime/Nighttime toggled blocks in the agent's page.
More Ideas
- Add a "clock" to a databox which tells the time based on the angle of directional light (ex: 12:00 when it's directly over the terrain, and increasing by 1 every 15 degrees, until it goes back to 0:00 after 23:00)
- Instead of a mountainous terrain, create a sandy beach terrain with a water level that rises and falls over time to mimic ocean tides. Make the patches that become submerged in water darker than those that are never reached by the tide.
- Populate your terrain with different agents, some being nocturnal, others being diurnal, with differing behaviors during night vs day. Example: https://staging.slnova.org/Yasmin/projects/691770/
- Instead of mountainous terrain, create a desert, island, forest, etc.
- Make a game or simulation using your terrain as a backdrop.
Copyright 2024 MIT Scheller Teacher Education Program. Distributed under Creative Commons license CC BY-NC 4.0.