6. Conway's Game of Life

Description
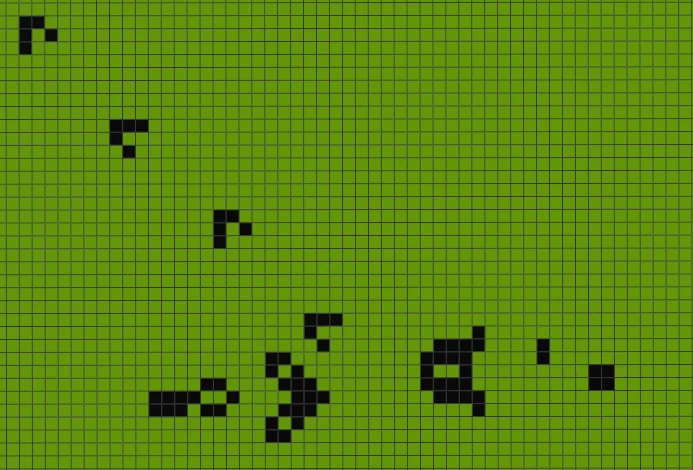
In this activity, you will be implementing John Conway's Game of Life (also called "Life") in StarLogo Nova. The setup for the Life game is an infinite grid where initially some cells are colored (holding the status "live"). Indicating which cells are alive in the beginning is the only action required of the player, as the game establishes its next stage based on the previous state of the grid.
Rules
The way Life transitions from stage to stage is by updating each grid cell according to the following rules:
- Survival: A live cell with 2 or 3 live neighbors lives in the next stage (a neighbor is a cell that's horizontally, vertically or diagonally adjacent)
- Underpopulation: A live cell dies if it has fewer than 2 live neighbors
- Overpopulation: A live cell with more than 3 live neighbors dies
- Reproduction: A dead cell with exactly 3 live neighbors gets revived
Patches and Conway's Game of Life
With the Patch features in StarLogo Nova version 3, we can implement Life! Patches represent the grids dividing the SpaceLand. SpaceLand is composed of 101x101 patches, and each patch has coordinates from -50 to 50 (inclusively), with the patch (0, 0) at the center. Because the SpaceLand has a finite number of grids, but Life works on an infinite grid, we will have live cells wrap around the SpaceLand (which will make cool patterns for spaceships).
Part 1: Setting Up Initial Patch Configuration
Goals: Set a subset of Patches to be live
Helpful Coding Blocks
| Block | Drawer | Use |
|---|---|---|
 | Environment | Gets the Patch at a specific coordinate. Can be used when working with traits. |
 | Traits | Changes the trait of an agent, in this case changes the color. |
 | Environment | Resets Patch traits: can choose between resetting color, height, custom traits, or everything. |
Setup Code
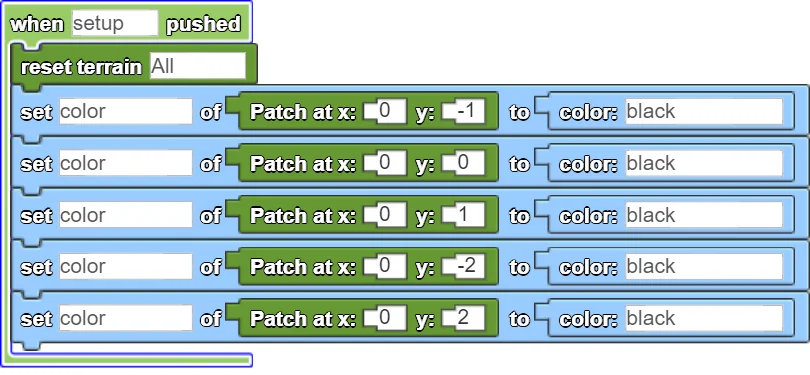
On the World page, program a few patches to be live once setup is pushed. One suggested configuration is a vertical column of 5 patches. For other interesting layouts, check the Initial Setup Suggestions at the end of this tutorial.
Check your Progress!
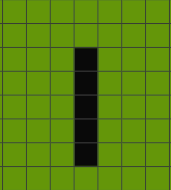
When you click setup, you'll see the vertical bar. If you turn on editing terrain mode, you can count and confirm its height is 5 patches.
Part 2: Counting Live Neighboring Cells
Goals: Learning to use variables when determining neighboring cells, and counting live cells
Steps
- Create variables for each neighboring patches
- Set variables to correct coordinates, accounting for edge coordinates
- Count the number of live neighbors
Helpful Coding Blocks
| Block | Drawer | Use |
|---|---|---|
 | Variables | Initializes a variable to a given value. |
 | Variables | Updates the variable to a new value. The variable is chosen from a dropdown, so in order to be updated, it needs to be initialized first. |
 | Variables | Gives the value of a given variable. |
Variables only exist within the block of code they're declared in.
1. Count Live Cells
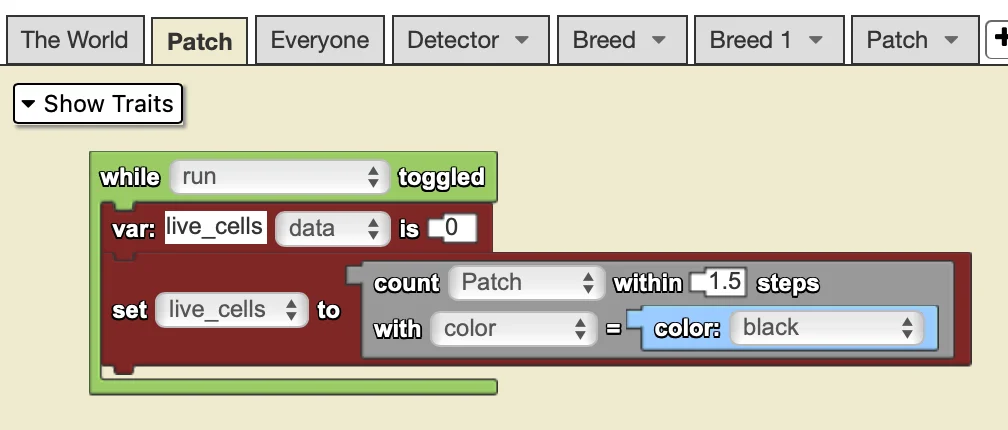
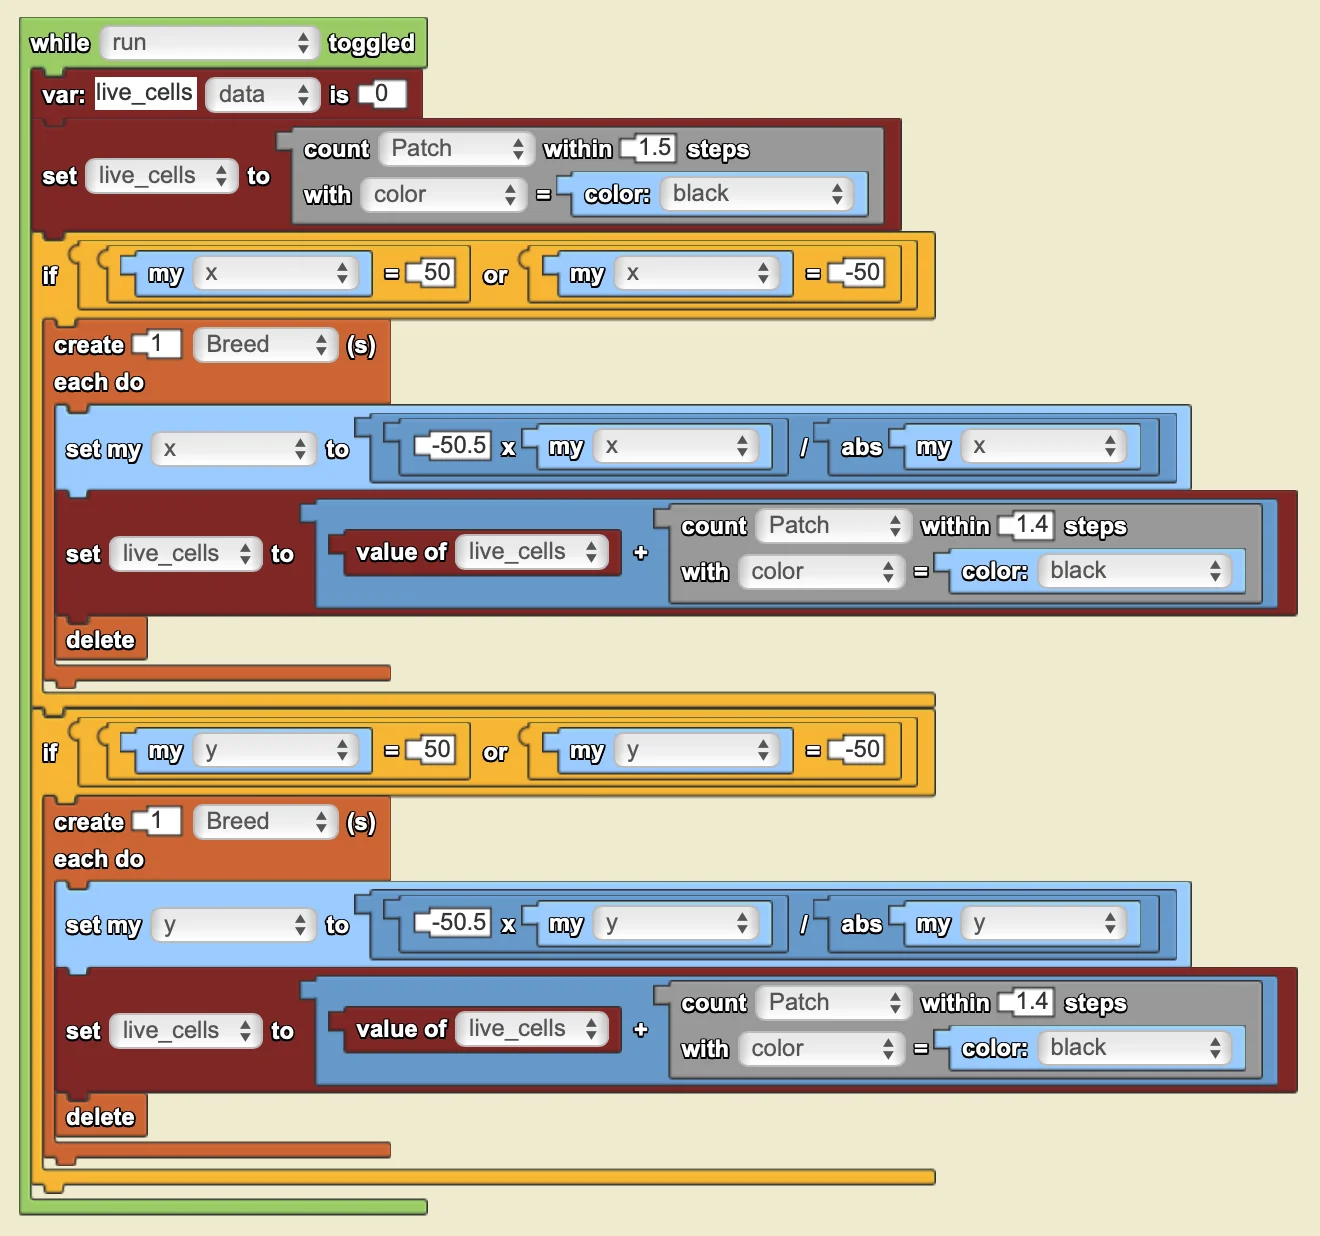
To continuously count the number of live cells surrounding a certain cell, we can use the detection block counting the number of patches that are alive (color = black) within 1.5 steps, and assign it to a live_cells variable. Patches are only counted in this area if the center of the patch is within a radius of 1.5 (1.5 steps will count all the adjacent patches).
2. Handle Edge Wrapping (X-axis)
In order to make the grid "infinite", patches on the edges will wrap around and count live cells on the opposite edge as well. To do this, if a patch has an x of -50 or 50 (it is on the left or right edge), make it create a counting breed that sets its x to the opposite side and the very edge of the map (x=-50.5 or 50.5). Then increase live_cells by the amount of live patches counted by the counting breed within 1.4 steps (1.5 steps would unnecessarily count an extra patch).
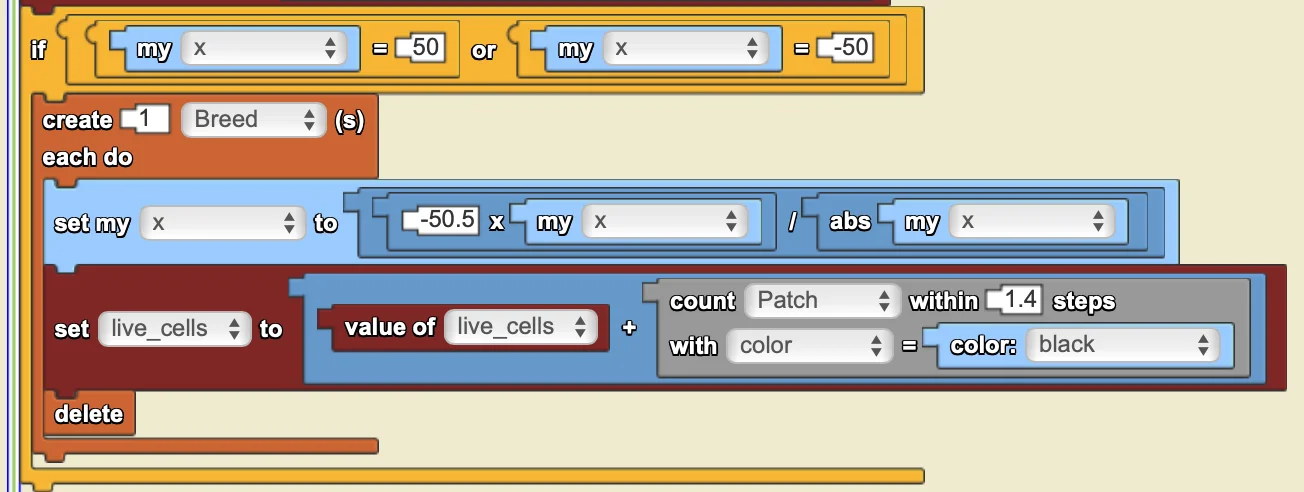
3. Handle Edge Wrapping (Y-axis)
Then repeat the same steps but substituting x with y.
4. Handle Corner Wrapping
If the patch is one of the 4 corner patches, make it add 1 to live_cells if the patch on the opposite corner diagonally is alive.
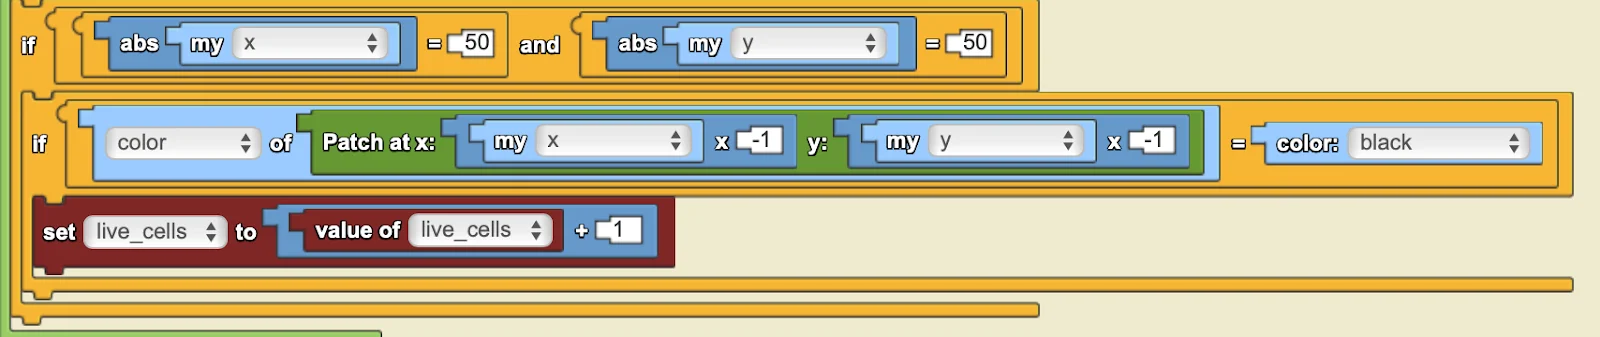
Full Part 2 Code
Here is the complete code for counting live neighboring cells, including all edge and corner wrapping logic:
Part 3: Apply Game of Life Rules and Set Custom Traits
Now that we have the live cells count, we can proceed with applying the rules for the Patches.
1. Apply Game of Life Rules
Because we essentially change the patches one by one, immediately changing the colors of the cell would interfere with counting live neighbors for other patches. Therefore we will have two custom traits that remember whether the patch will change its color.
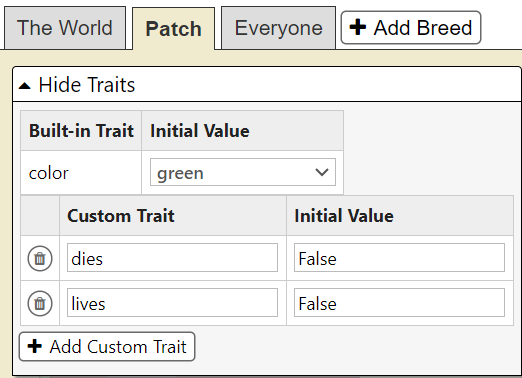
In the Patch page, make two custom traits:
dies— will hold the valueTrueif a patch is alive and will die in the next stagelives— will beTruewhen a dead patch becomes alive
If both dies and lives are False, it means the patch maintains its status in the next stage.
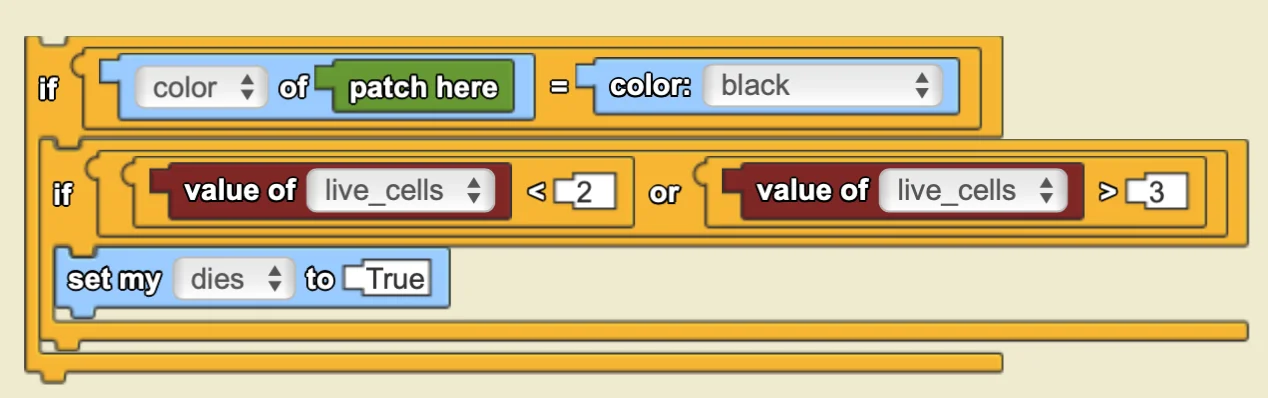
Death Rule
A live patch will die if either: there's less than 2 live neighbors (underpopulation), or more than 3 live neighbors (overpopulation).
Birth Rule
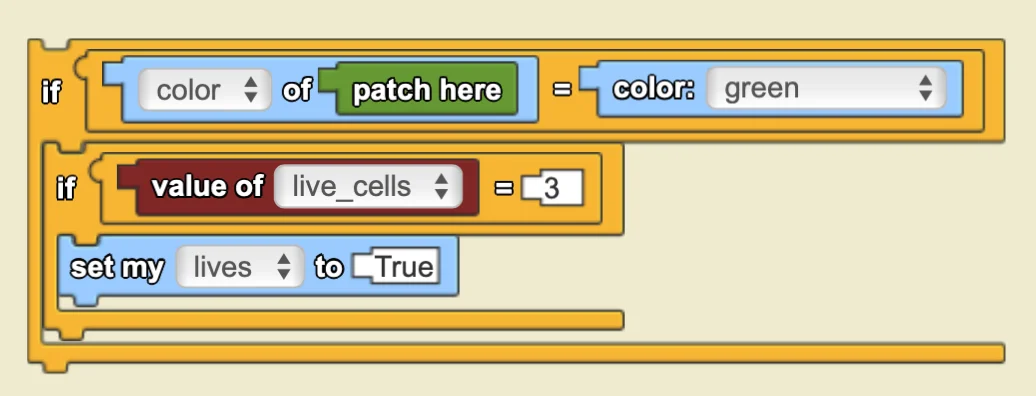
A dead patch will come to life if there's exactly 3 live neighbors (reproduction).
2. Update All Patches
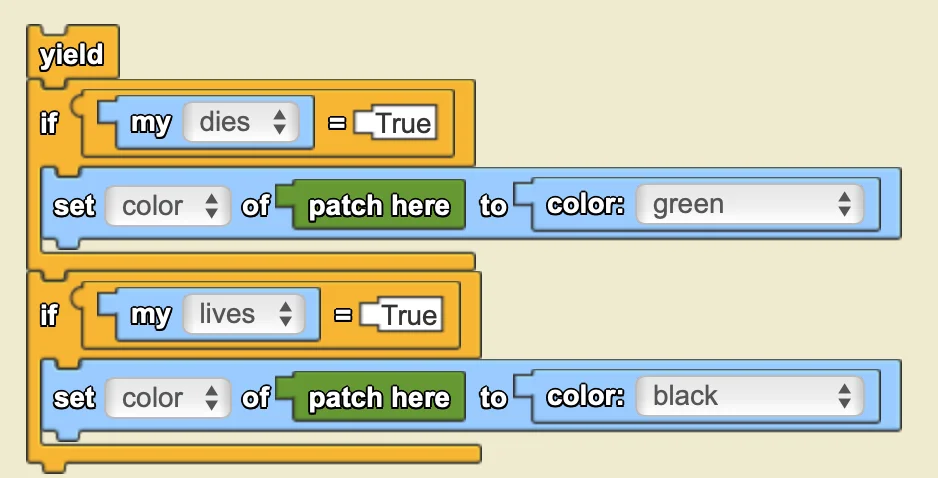
Add a yield block to give enough time for all patches to update. Now, check the custom traits and update patch colors accordingly.
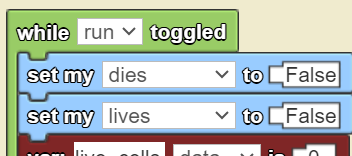
To reset the custom traits, set them to False at the beginning of the loop.
Check your Progress!
Toggle on the button run. If you've started with the vertical column, you will see the following progression. For other configurations, check that the program is running correctly by comparing it on conwaylife.com.
Phase 1
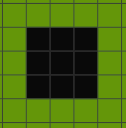
Phase 2
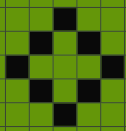
Phase 3
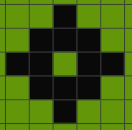
Phase 4
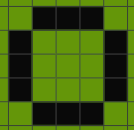
Phase 5
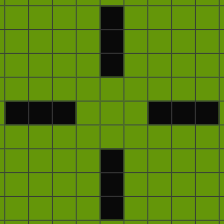
Phase 6
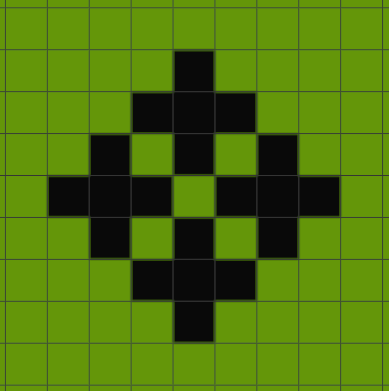
Phase 7
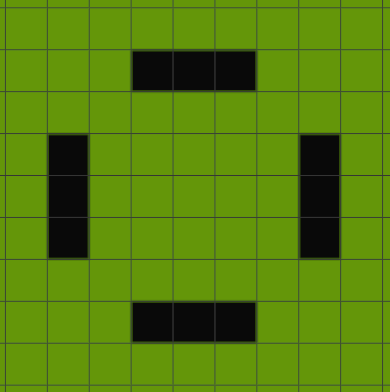
Phase 8
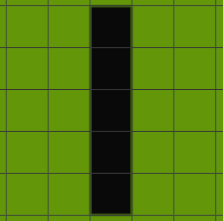
Initial Setup Suggestions
The Game of Life has attracted a lot of interest over the years because of the multitude of interesting initial settings that make even more interesting layouts. There are a few types you might want to try in StarLogo Nova and see how it develops over time.
Still Lifes
Forms that keep their structure throughout the game.
| Pattern | Representation | Patch Coordinates |
|---|---|---|
| Block | 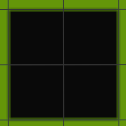 | (0, 0), (1, 0), (0, 1), (1, 1) |
| Beehive | 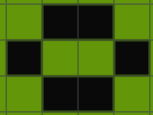 | (0, 1), (0, -1), (1, 0), (-1, 1), (-1, -1), (-2, 0) |
| Cross | 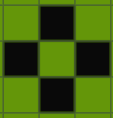 | (1, 0), (-1, 0), (0, 1), (0, -1) |
Oscillators
Layouts that eventually repeat the same form, in a cycle.
| Pattern | Representation | Patch Coordinates |
|---|---|---|
| Blinker |  | (0, 1), (0, 0), (0, -1) |
| Beacon | 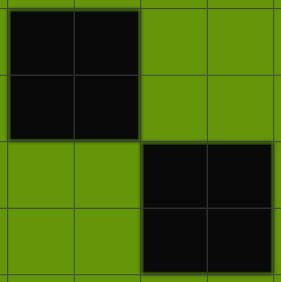 | (-2, 2), (-1, 2), (-2, 1), (-1, 1), (0, 0), (1, 0), (0, -1), (1, -1) |
Spaceships
A pattern that returns to its initial form after a period, while gliding across the grid diagonally.
| Pattern | Representation | Patch Coordinates |
|---|---|---|
| Glider | 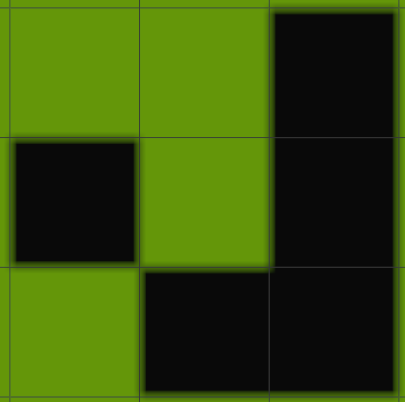 | (0, -1), (-1, 0), (1, -1), (1, 0), (1, 1) |
Random Initial Setup
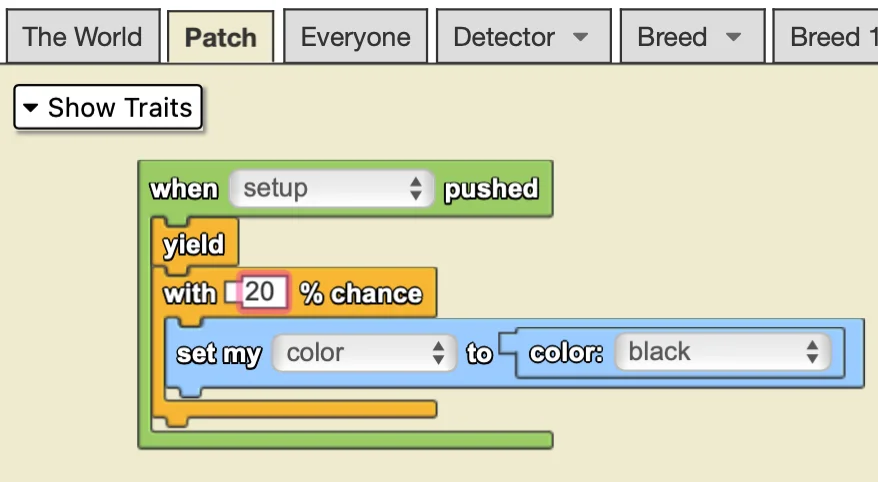
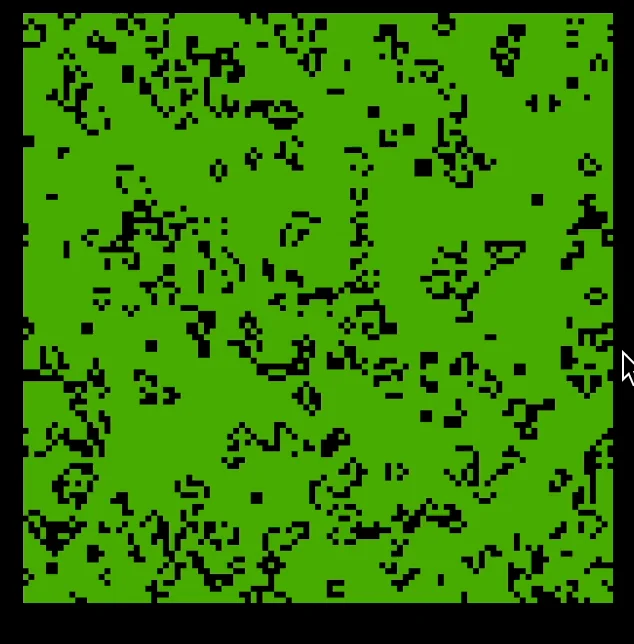
Try initializing with random patterns and observe how the terrain changes over time.
Copyright 2024 MIT Scheller Teacher Education Program. Distributed under Creative Commons license CC BY-NC 4.0.